
Using the Appointment List
Appointments can be found in two places: the Appointment List and the Schedule Board. The Appointment list is used to manage appointments made within Total Office Manager.
Accessing the Appointment List
-
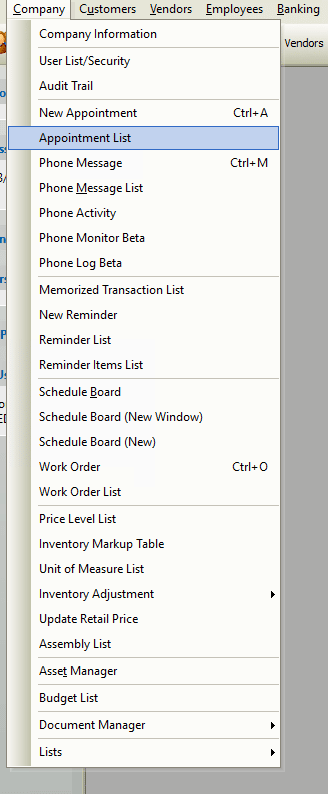
From the main menu, click Company | Appointment List.
-
From the toolbar, click the drop-down arrow just right of the schedule board button and choose View Appointment List.

Field Definitions
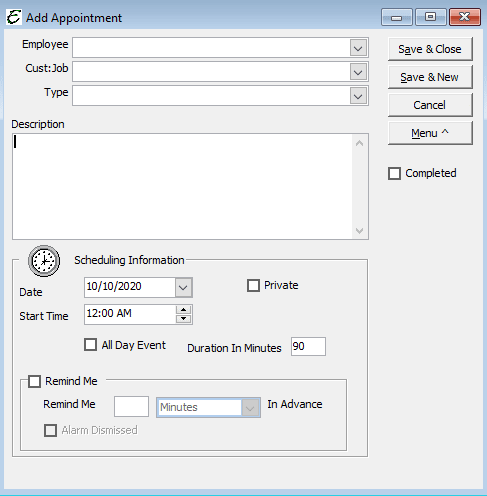
- Employee – Displays the name of the person the appointment is scheduled for.
- Cust:Job – Displays the customer (if any) which is associated with the appointment. The appointment is included in the customer’s history.
- Type – Displays the appointment type. These work just like work order types.
- Examples may include “personal”, “business”, “medical:, etc.
- Description – Displays detailed information regarding the appointment. This information also appears on the Schedule Board.
- Date – Displays the date of the appointment.
- Start Time – Displays the time of day when the appointment is scheduled.
- Private – Indicates whether or not this is a private appointment. Private appointments do appear on the Schedule Board, but no details are displayed.
- Note: The administrator can view all appointments, even ones marked private.
- All Day Event – Tick the box if the appointment is scheduled for an entire work day
- Duration In Minutes- Displays the length of time in minutes that the appointment is scheduled to last.
- Remind Me – Set a time to notify the user in advance of when the appointment is scheduled to occur
- Completed – Displays whether or not the appointment has been completed.
Usage
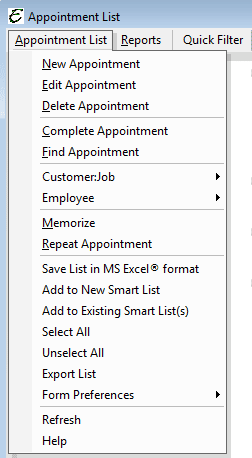
- To create a new appointment, right-click anywhere in the list and choose New Appointment from the pop-up menu.
- To edit an appointment, right-click on it and choose Edit Appointment from the pop-up menu.
- To delete an appointment, right-click on it and choose Delete Appointment from the pop-up menu.
- To complete an appointment, right-click on it and choose Complete Appointment from the pop-up menu.
- To find an appointment, right-click on it and choose Find Appointment from the pop-up menu. The schedule board will open and display the appointment highlighted in red.
- To memorize an appointment, right-click on it and choose Memorize from the pop-up menu.
- To repeat an appointment, right-click on it and choose Repeat Appointment from the pop-up menu.
- To export whatever information is currently displayed in the list, right-click anywhere in the list and choose Export List from the pop-up menu.
- To modify which columns are displayed in the list, right-click anywhere in the list and choose Form Preferences | Show Columns from the pop-up menu.
Tips
- The administrator can view all appointments, even ones marked private.
- Click the drop down arrow next to the Schedule Board to Create Appointment or View Appointment List.
- You can delete multiple appointments. To highlight multiple appointments, press and hold your Ctrl key and click each appointment. Select a range of appointments by highlighting the first appointment in that range, pressing and holding the left Shift key, and clicking the last appointment in that range.

