

Introduction
Invoices created in Aptora Mobile II will be designated in Total Office Manager as a new type called ‘Mobile Invoice’. Mobile Invoices and payments accepted in Aptora Mobile II DO NOT directly affect Accounts Receivable (A/R), Income, COGS, or other accounts. Instead, Approving Invoices & Applying Payments will occur in Total Office Manager.
Mobile Invoices must first be approved and converted into a standard Invoice in Total Office Manager. All Invoice validation remains the same, including preferences such as those requiring a Salesman, Department, or Sales Tax Item.
-
To approve a Mobile Invoice, open the Mobile Invoice in Total Office Manager and save it.
-
You may make changes to this Invoice as you would any normal Invoice.
Once a Mobile Invoice has been approved, all financial accounts (A/R, Income, COGS, etc.) will be affected as usual.
An Invoice that was created from Aptora Mobile will always have the “Mobile Invoice” in the security stamp at the bottom left of the form.
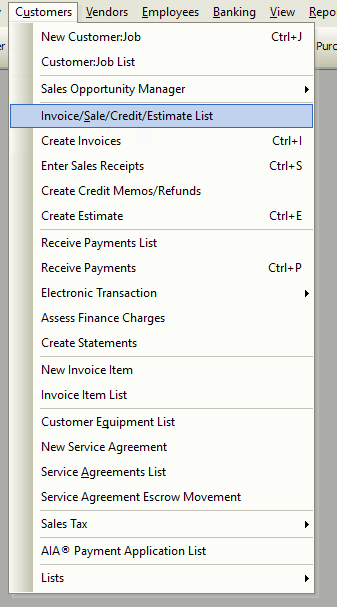
Form Access
- From the main menu, click Customers | Invoice/Sale/Credit Estimate List. Then, click on the Mobile Invoices user filter to see all Invoices that need to be saved into Total Office Manager.
Step-By-Step
The following steps specifically detail how to approve an Invoice in Total Office Manager. This involves turning it from a Mobile Invoice to a standard Invoice (which can be processed and modified as any normal invoice).
Applying Payments Made in Aptora Mobile II to Total Office Manager
Mobile Invoices and payments accepted in Aptora Mobile II DO NOT directly affect Accounts Receivable (A/R), Income, COGS, or other accounts. It isn’t until the ‘Mobile Invoice’ is converted to ‘Invoice’ where the accounting of the payment takes place. For instructions on how to do this, please see below.
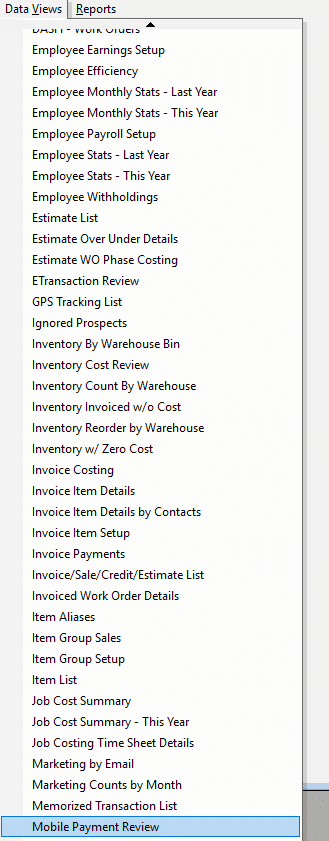
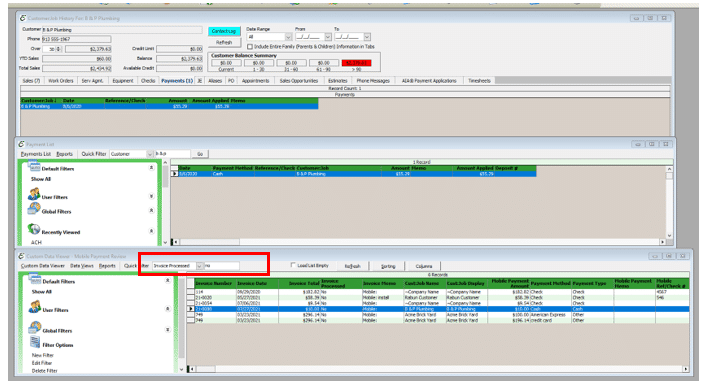
This can be seen from the Customer Data View – Mobile Payment Review. Navigate here by Reports | Custom Data Views | Mobile Payment Review. Under the Quick Filter, select ‘Invoiced Processed’ and type ‘No’ into the text field.
Converting a Mobile Invoice into an Invoice
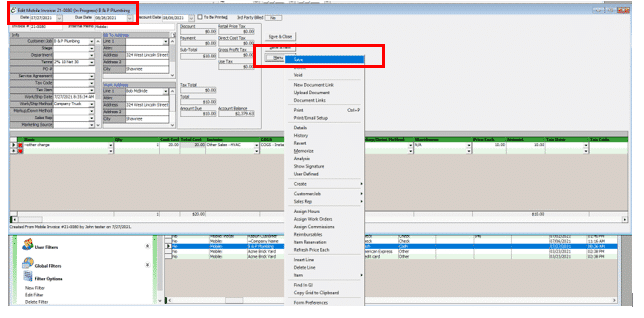
- Go to Lists | Invoice/Sale/Credit/Estimate.
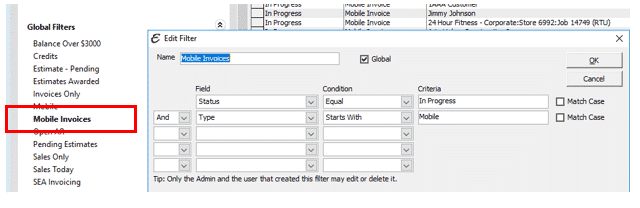
- Select the Invoice with the type “Mobile Invoice” you wish to approve. It may be helpful to filter or sort your list by type to easily see only this specific type.
- Note – The screenshot above is an example filter that can be created.
- Open/Edit the Invoice. Notice the type in the top left corner reflects ‘Mobile Invoice. Make any changes to this Invoice as you would any other (such as changing the Sales Rep, Tax Code, etc.).

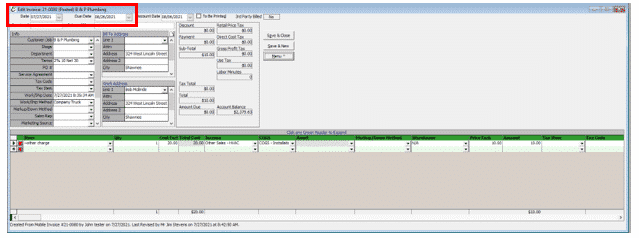
Saving Mobile Invoice - When finished, click Menu | Save or Save & Close to convert the Mobile Invoice into a standard Invoice. After saving, the type in the top left corner will now reflect ‘Invoice’.

Approving Invoices & Applying Payments – Converted Mobile Invoice to Invoice - To view the approved Invoice, to the Customer History of the Customer:Job and click on the ‘Sales’ tab. The Invoice will now be recorded.
Tips
- You can also easily locate unapplied payments via Customer History as shown in the screen shot above.
Related Content
https://www.aptora.com/help/payment-list/
