

Company Access Portal Setup and Usage
What You Will Learn
This help topic explains how to setup your company’s preferences for Aptora’s Customer Access Portal. It also covers the basics on how to use the product from your company’s perspective and from your own customer’s perspective.
How to Purchase the Product
You can learn more about it and buy the Customer Access Portal here.
Requirements
- You must own Aptora Mobile II and have that system fully functional.
- You will need to know the password for your Aptora Mobil II Administrator user account (the built-in Administrator user).
Step-by-Step Setup
Decide What the Customer Can See
To set up your company in the Customer Access Portal (CAP), you will first select the preferences for the information you want your customers to see when they login to the portal.
- You can choose to allow them to view only today’s Work Orders, future Work Orders, or both.
- You may choose to allow them to view Estimates that are Pending, In Progress, or Revised or all three.
Here is how to set up your company preferences:
- Use your existing ADMIN username and password to login to Aptora Mobile II.
- Click on the Hamburger Menu > More > Settings > Customer Access Portal.
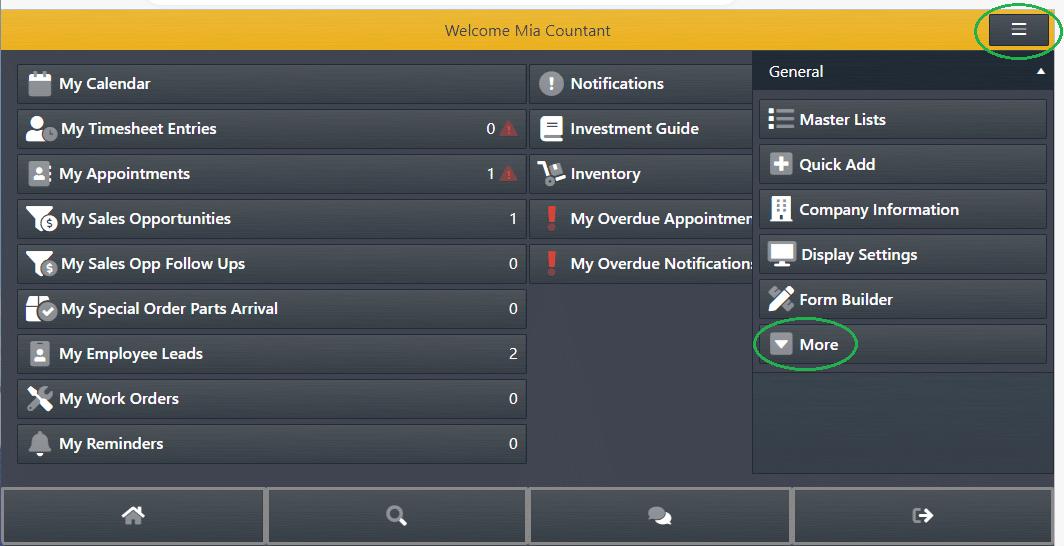
Figure 1: Hamburger and More Menu Selections

Figure 2: Settings Menu Selection
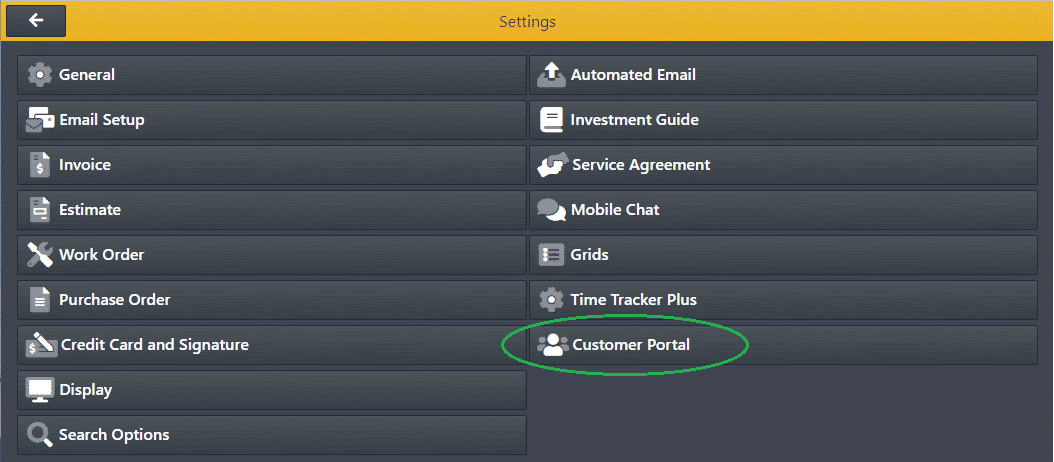
Figure 3: Customer Access Portal Menu Selection
- Select from the ‘Work Orders will be displayed to customers:’ drop-down option whether you want your customers to view only today’s Work Orders, future Work Orders, or both.
Figure 4: Work Orders Preference Selection
- Select from the ‘Estimates will be displayed to customers:’ drop-down option whether you want your customers to view only Estimates that are Pending, In Progress, Revised, or All Three.
Figure 5: Estimates Preference Selection
- To save your selections, click the [Save] button in the top right corner.
Figure 6: Save Button
- To return to the home page, click the [Home] button in the bottom left corner.
Figure 7: Home Button
