
Introduction
This topic will cover the Receive Items and Enter Bill Form for entering, editing, and deleting bills in Total Office Manager. If you need to receive and item but you don’t have a bill, use the Item – Receive Items Without a Bill form.
Usage
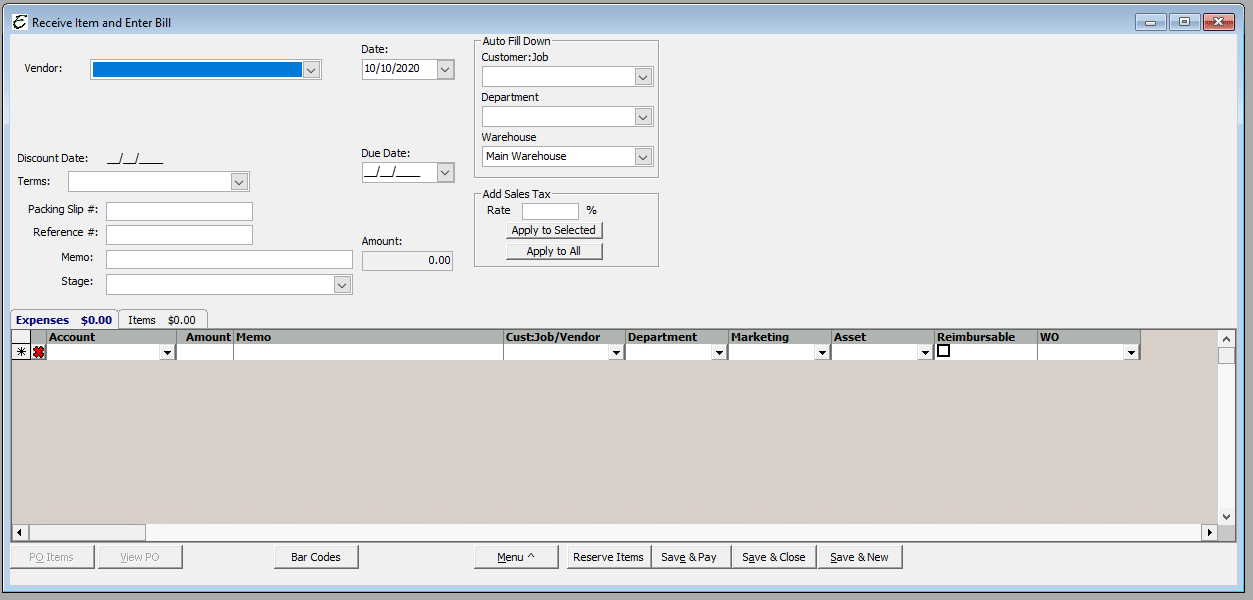
Entering a bill here puts the bill in accounts payable. You will pay the bill later, when it is due using the Pay Bills form. This allows Total Office Manager to keep track of how much money you owe. This allows you to hang on to your money for as long as possible, improving cash flow. This is the exact same form as Enter Bill, except when opened; the Items tab has the focus .
Use this form if the items arrive with a bill, you can enter your receipt of the items and the bill in a single step.
You may be prompted about receiving against a purchase order for this vendor. If there are one or more purchase orders select the one that pertains to the particular bill you are entering.
Use Expense or Item Tab?
Note: Expenses are those you track through Expense Accounts. Items are those you track through your item list .
When you enter bills, you need to use expenses to categorize what your money is being spent on. Think of expenses as money that leaves the company.
Example: If you pay $100 per month for copier paper, you would assign that bill to an expense account set up for office supplies.
You need to set up items to count the services or products that your business buys.
Think of items as anything that your company buys, sells, or resells in the course of business, such as products, shipping and handling changes, discounts, and sales tax (if applicable).
Example: If your business buys a service, the vendor may charge for that service item by the hour. If your business buys products or parts, you can track each item you pay for.
When you enter a bill, you fill in the expense or item tabs as appropriate to correspond to what you’re buying.
Note: To enter shipping charges or taxes not associated with any one item, click the Expenses tab. In the detail area, enter each charge and associate it with its correct expense account.
DO NOT FORGET! You have to go to the pay bills window to actually paid the bill, when the bill is due for payment.
Receiving and Paying For Items at the Same Time
If you pay for items as soon as you receive them, you can skip the Accounts Payable process. Instead, use one of the following methods.
- To pay for items with a check, go to the Banking menu and select Write Checks.
- To pay for items with a credit card, go to the Banking menu and select Enter Credit Card Charges.
- To pay for items with cash, go to the Banking menu and select Write Checks. Choose your petty cash account from the drop-down list in the Bank Account field.
-
- In each situation, when you enter the vendor name, answer Yes at the message about receiving against an open purchase order for this vendor. Select the purchase order and click OK.
-
- On the items tab of the Write Checks or Enter Credit Card Charges window, adjust the quantity received if necessary.
Form Access
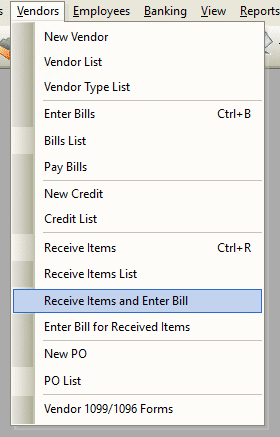
- From the main menu, click Vendor | Receive Items and Enter Bill.
Field Definitions
|
Vendor |
Select from the drop down menu the Vendor. Or create a new vendor by clicking the hand icon to the right of the Vendor field. |
|
Date |
The current date will automatically popular the field, or you can enter another date by clicking on the drop down arrow for the calendar. |
|
Amount |
Do not enter a dollar amount in this field. It will automatically popular with the correct dollar amount once all amounts are entered. |
|
Reference # |
Enter the Invoice / bill number, or any number you would like to track this bill. |
|
Memo |
Enter any general information you might need to track this particular bill. |
Field Definitions
Expenses Tab

|
Account |
Select from the drop down menu the expense account that is to be affected by the bill. |
|
Amount |
Enter the amount of the bill for the particular expense being entered. You may be entering more than one expense item. |
|
Memo |
Enter any particular information pertaining to the expense bill you are entering, that you may need to help track this expense bill. |
|
Cust:Job/Vendor |
Select from the drop down menu the customer job for this particular expense bill, if applicable. |
| Department |
Select the department (if any) that this expense is related to. If you need to, you can split the check up using as many line items as needed. This allows you to have departmentalized financial statements. |
| Marketing |
Select the correct marketing type (if any) that this expense relates to. This is how Total Office Manager matches marketing types with expenses. This information appears on certain reports and allows you to see which marketing types perform best by comparing its expense with related sales. |
Items Tab

|
Item Code/ Description |
Select from the drop down menu the particular item code/description of the line item you are enter. |
|
Qty. |
Enter the fiscal number of the line item you are entering the bill for. Example: 3 |
|
Warehouse |
Enter the warehouse (storage) location you are taking the bill items from. |
|
Cost |
Enter the cost of the Bill item you are entering. Example: $25.00 |
|
Amount |
Enter the total amount of the line item Bill you are entering. Example: $75.00 |
|
Customer Job |
Select from the drop down menu the Customer/Job, if applicable. |
|
PO / Serial #s |
Enter the P.O. or the Serial Number, if applicable. |
|
Department |
Select the department (if any) that this expense is related to. If you need to, you can split the check up using as many line items as needed. This allows you to have departmentalized financial statements. |
Button Definitions
|
Save & Close |
Click to save the bill and close the form. |
|
Save & New |
Click to save the bill and open a new Enter Bill window. |
|
Clear |
Clear the information that has been entered into the bill window. |
Step-By-Step
- Open the form and Sort the list if desired.
- To enter a new bill, click the Bill button (lower left hand corner of the form) and select New Bill.
- To edit a bill, click the Bill button (lower left hand corner of the form) and select Edit Bill.
- To delete a bill, click the Bill button (lower left hand corner of the form) and select Delete Bill.
Tips
- You can delete multiple bills. To highlight multiple vendor bills, pressing and holding your CTRL key and click each bill. You may also select a range of bills by highlighting the first bill in that range, pressing and holding your left Shift Key, and clicking the last bill in that range.
- You can select a bill and right click for common task.
Related Content
https://www.aptora.com/help/entering-credits-vendor-credit-list/

