
Using the Receive Payments Form (customer payments)
This topic explains the use of the Receive Payments form. This form is used to receive a payment from a customer and apply that payment to an invoice or to create a credit that can be used later. It may also be used to receive down payments on jobs.
Using the Receive Payments Form
Use this form to receive payments against invoices that you have created for customers. Please read the “Tips” at the bottom of this topic for import information.
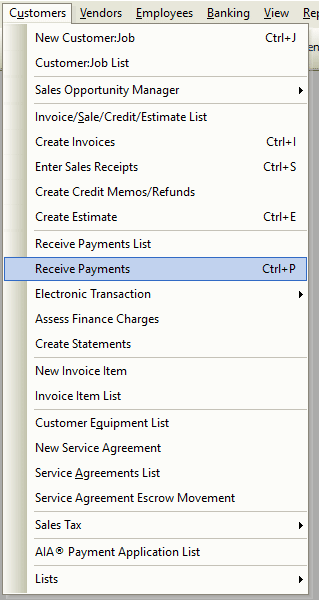
Accessing the Receive Payments Form
-
From the main menu, click Customers | Receive Payments.
Receiving Payments Step-By-Step
- Open the Receive Payments form as noted above. You should now see the New Payment window.
- Using the customer selection box at the top of the form, select the customer who has made a payment. Use the <Lookup> feature to help locate hard-to-find customers.
- Important Note: It is best to select the exact Customer:Job and not the parent (if any). In other words, don’t select a parent (top level) and apply payments to children (sub-accounts).
- Using the Pay Method, select the correct method of payment. If a credit card was used, Total Office Manager provides you with fields to enter the CC number and expiration date. For legal reasons, the CID number should not be entered on this form and therefore no field is provided.
- Enter a memo in the Memo field as needed. We like to recommend that you get into the habit of entering good memos all over Total Office Manager!
- Select a Department if needed. The feature can be used for advanced purposes, such as interdepartmental accounting and more. Financial reports, including the Departmentalized Income Statements, do not use this information. It is stored in case that information is needed for other purposes.
- Using the Deposit To selection box, select the correct bank account that this payment will be deposited into or select the Group With Other Undeposited Funds from the list.
- The Date field is automatically populated with the current date; please change the date if needed.
- Enter the amount of the payment in the Amount field.
- The Ref/Check # field offers a place to enter a check number or any other reference entry you wish.
- Check the Show Discount Information and/or Show Credit Information boxes to display invoices and credits to apply this payment to. This list will populate with everything you can apply the payment to.
- Select the correct items from the list to apply the invoice to. Do this by clicking the Pay button (on the list to the left side of the item).
- Double check your work and click Save & Close or click Save & New to make another payment.
Receive Payments Form Field Definitions

|
Customer – |
The customer who has paid you. When you select a customer, you should then see Total Office Manager populate the list below will all invoices that have not been paid. |
|
Pay Method – |
The method the customer used to pay you. Examples may include check, cash , credit card, etc. |
|
Card Number – |
If a credit card was used, this space is where you enter the credit card number. |
|
Exp. – |
The expiration date of the credit card. |
|
Memo – |
Use this field to enter any notes about this payment. |
|
Department – |
The feature can be used for advanced purposes, such as interdepartmental accounting and more. Financial reports, including the Departmentalized Income Statements, do not use this information. It is stored in case that information is needed for other purposes. |
|
Deposit To – |
Tells Total Office Manager how to handle the deposit. You can select a Bank Account. This is the bank account where this money will be deposited to. You can select Group With Undeposited Funds to group this payment with others and treat them as one deposit. See Deposit Types Explained for more information. |
|
Date – |
This is the date the payment was made. Total Office Manager will auto populate this field with the current date but you can change it to reflect an earlier or future date. |
|
Amount – |
The amount the customer has paid you. |
|
Ref/Check # – |
This field is usually used to enter the check number but you can use it for any other purpose. |
|
Total Payments – |
This field is automatically populated and displays the total amount payments this customer has paid you in the past. |
|
Total Credits – |
This field is automatically populated and displays the total of any and all unused credits this customer may have. |
|
Total Discounts – |
This field is automatically populated and displays the total amount of discounts this customer has. |
|
Total Due – |
This field is automatically populated and displays the total due. |
|
Total Amount – |
This field is automatically populated and displays the total amount of money this customer owes you. |
|
Unused Payments – |
This field is automatically populated and displays the total of any payments that have not been applied to a specific invoice. |
|
Unused Credits – |
This field is automatically populated and displays the total of any credits that have not been applied to a specific invoice. |
|
Show Discount Information – |
Displays a column which is populated with discount information. |
|
Show Credit Information – |
Displays the amounts for any credits that are available. |
Menu Button Definitions
|
Set Credit – |
Opened a list of available credits that may be applied to what the customer owes you. These are credits that you may have entered. |
|
Auto Apply – |
Total Office Manager applies the amount of the payment to the first items on the list (oldest invoices). |
|
Save & Close – |
Saves your work and closes the form. |
|
Save & New – |
Saves your work and clears the form so that you can enter another payment. |
Tips Related to Receiving Payments from Customers
- Important: Avoid receiving a payment for a parent account and applying that payment to a child of that parent. It is best to select the exact Customer:Job and not the parent (if any). In other words, don’t select a parent (top level) and apply payments to children (sub-accounts).
- If a customer pays you at the time you do the work or deliver the product (COD), use the Sales Receipt form.
- If a customer pays you a portion of the total, use an invoice by Add a Payment Item to the invoice to show the payment.
- Use the Credit Memo form to receive a down payment on a job or a sale of some kind.
- If you wish to pay an invoice with a Barter Exchange, please see the Barter Trade topic.
- If you receive full payment at the time of the sale, use a sales receipt form instead of an invoice with a payment item.
- If you choose a payment method, you can group the money you receive by payment method when you deposit it (all checks in one deposit, all MasterCard® charges in another deposit, etc.). Create a separate payment item for each payment method your customers use.
- If you are not receiving a payment against an invoice, you will be told by the form that a credit was created. You can use this later and apply it to an invoice.
Related Content
https://www.aptora.com/help/deposit/

