
How to Write Checks to Pay Expenses and Paying Bills
The Write Checks form can be used to pay bills as you receive them or to pay bills previously entered. It is not used for paychecks or payroll check processing.
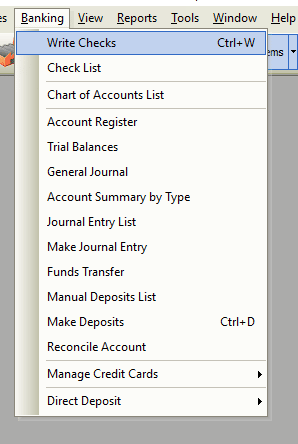
Accessing the Write Checks Window (form)
-
From the main menu, click Banking | Write Checks or
-
From the toolbar, click the Write a Check button.

Using the Write Checks Windows (form)
Paying bills with the Write Checks form is easily done. Fill out the check with the appropriate information, fill in your check number from your company checkbook, print the check (or write by hand), click the Save & Close button and you’re done!
If your checks can be printed on your computer system, just click ‘To Be Printed’ then print all of your checks at one time as part of a batch print job and the system will automatically number the checks for you when they are printed.
Use the Write Checks window and assign the amounts to appropriate expense accounts. You can write a check for any kind of expense you track through expense accounts and for the following types of items: non-inventory part, service, and other charge. If you are using the inventory /purchase order feature, you can write checks for inventory part items too.
To write checks for inventory or other items, click the Items tab of the Write Checks window and enter the items.
Choose A Default Account For Writing Checks
The Write Checks form will open using your default checking account. If there is no default checking account, the account from the previously written check is proposed.
To set a default checking account from the main menu click Edit | Preferences | Checking. Choose your preferred account from the Default Bank Account drop down list.

Cancellation of a Prepaid Order
This procedure assumes that you recorded the down payment in the Receive Payments window (A/R). To ensure proper accounting, you must record down payments in the Receive Payments window, rather than the Make Deposits window. After you record the check, you must go to the Receive Payments window to apply the check as a “credit” against the customer’s down payment. This ensures correct accounting for the check.
Writing A Check To The Insurance Carrier
In the Account column , choose the liability account or subaccount you use to track how much you owe this carrier (Example: Liability Account: All State). In the Customer: Job column, choose the appropriate policyholder (customer) and policy (job).
Field and Button Definitions
Check Area
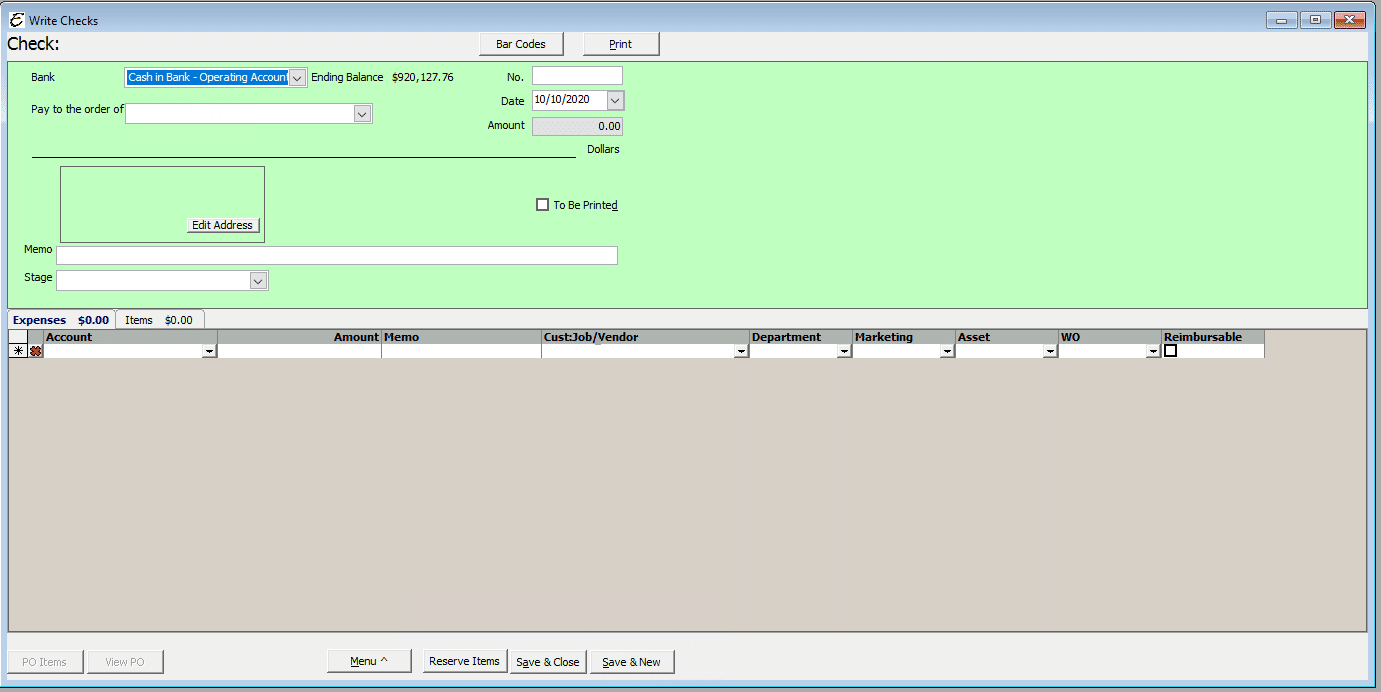
- Bank – Select from the drop down menu the account you write your checks out of. Or create a new account by click the Hand Icon to the right of the bank field.
- Pay to the order of – Select from the drop down menu the Vendor/Person you are writing the check to. Or create a new Vendor/Person by click the Hand Icon to the right of the Pay to the order of field.
- No. – If you are using checks printed off your computer system, check ‘To Be Printed’. If you are using a company checkbook, enter the next check number.
- Date – The current date will automatically populate the field, or you can enter another date by clicking on the drop down arrow.
- Amount – Do not enter a dollar amount in this field. It will automatically populate with the correct dollar amount once all amounts are entered.
- Address – The address will automatically populate, according to the ‘Pay to the Order of’ you select above.
- Edit Address – Select to make corrections to address if needed.
- Memo – Enter any general information you might need to track this particular check.
Expenses Tab

- Account – Select from the drop down menu the account that is to be affected by the check.
- Amount – Enter the amount of the particular expense being entered. You may be entering more than one expense.
- Memo – Enter any particular information pertaining to the expense you are entering, that you may need to help track this expense.
- Customer/Job – Select from the customer/job drop down for this particular expense, if applicable. This is used in Job Costing as well as makes the expense available on a sale or invoice as “reimbursable”.
- Department – Select the department (if any) that this expense is related to. If you need to, you can split the check up using as many line items as needed. This allows you to have departmentalized financial statements.
- Marketing – Select the correct marketing type (if any) that this expense relates to. This is how Total Office Manager matches marketing types with expenses. This information appears on certain reports and allows you to see which marketing types perform best by comparing its expense with related sales.
- Asset – Select the corresponding asset the expense is tied to (if applicable).
- WO – The WO field is used to indicate the work order to which the line item is associated. If the Customer field has been filled in, the WO drop-down list will display work orders for that customer only. If the Customer field has not been filled in, the WO drop-down list will only make available <Lookup> as a selection. Clicking <Lookup> will open the Work Order Lookup list, which can be used to lookup any work order in the system. Double-clicking on a work order will populate both the Customer field and the WO field in the original purchase order.
- Reimbursable – Tick the box if the expense is reimbursable to the Customer:job
Items Tab

- Item Code/Description – Select from the drop down menu the particular item code/description of the line item you are entering.
- Qty. – Enter the number of items.
- Warehouse – Enter the warehouse (storage) location you are taking the item from.
- Cost – Enter the cost of the item you are entering. Example: $25.00
- Amount – Enter the total amount of the line item you are entering. Example: $75.00
- Customer/Job – Select from the customer/job drop down menu if needed. This is used in Job Costing as well as makes the item available on a sale or invoice as “reimbursable”.
- PO / Serial #s – Enter the P.O. or the serial number, if applicable.
- Department – Select the department (if any) that this expense is related to. If you need to, you can split the check up using as many line items as needed. This allows you to have departmentalized financial statements.
- Asset – Select the corresponding asset the item is tied to (if applicable).
- WO – The WO field is used to indicate the work order to which the line item is associated. If the Customer field has been filled in, the WO drop-down list will display work orders for that customer only. If the Customer field has not been filled in, the WO drop-down list will only make available <Lookup> as a selection. Clicking <Lookup> will open the Work Order Lookup list, which can be used to lookup any work order in the system. Double-clicking on a work order will populate both the Customer field and the WO field in the original purchase order.
- Reimbursable – Tick the box if the item is reimbursable to the Customer:job
Other Controls
- Save & Close – This button saves the check and closes the form.
- Save & New – This button saves the check and opens a new form.
Tips
-
The amount of the check and the written out dollar amount of the check will automatically populate with the grand total, once the amounts have been entered in the expense tab or item tab of the check.
IMPORTANT – DO NOT USE THE WRITE CHECKS WINDOW FOR THE FOLLOWING:
- Paying employees – Use the Process Pay Group form (Employees | Process Pay Group).
- Paying sales tax – Use the Pay Sales Tax form (Customers | Sales Tax | Pay Sales Tax).
- Paying payroll taxes and liabilities – Use the Pay Liabilities form (Employees | Pay Payroll Liabilities).
- Paying bills already entered in the system – Use the Pay Bills form (Vendors | Pay Bills).

