
How to Setup Automated Email
Aptora Mobile II includes an automated email system for reminders, confirmations, and thank you messages to communicate directly with customers. This topic covers how to setup and use the auto email setup. Note that this feature is different from Aptora’s Automated Text Feature that is also offered.
Please note that this content is part of a series. Click here for Aptora Mobile II – Auto Email – Usage.
Total Office Manager Setup
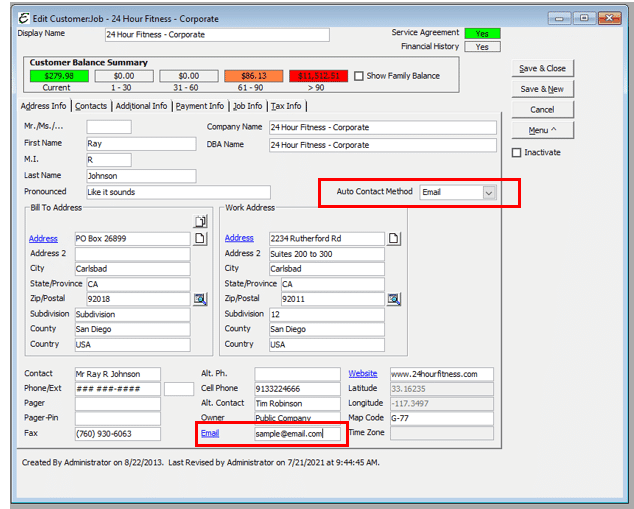
Total Office Manager allows for one primary Automated Contact Method (can be set to Text, Email, or Do Not Contact). In order for the Automated Email feature to work, there are two adjustments that, on the Address Info tab of the Customer:Job form, need to be modified.
- Automated Contact Method set to “Email”.
- A valid email address is entered into the Email field.
Credential Setup in Aptora Mobile II
Step-By-Step
- Open Aptora Mobile II.
- Login as Administrator. Only the administrator user can access the following automated email setup options.
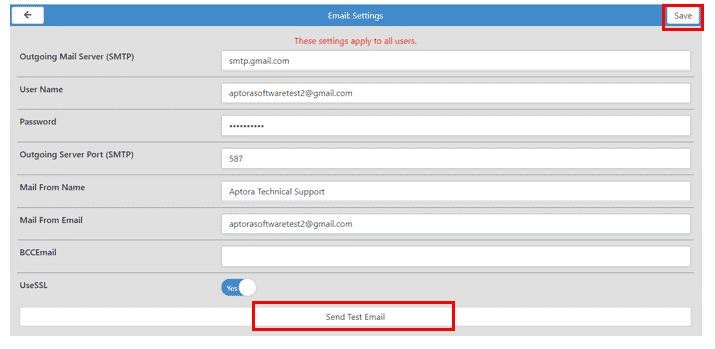
- From the Dashboard, click More | Settings | Email Setup.
- Fill in the required fields as designated by your organization. Please refer to your IT profession for proper configuration of settings. Reference this article as well.
- Click Save in the upper right corner to store the credentials.
- Click the “Send Test Email” button.
- You should receive a message indicating the message was delivered successfully to your email address. Check your email inbox to verify.
- Be sure to check your spam folder too. If found the email in the spam or junk folder please be sure to right-click on the message and scroll down to “Not Junk”.
Auto Email – Setup – Aptora Mobile II
Step-By-Step
- Open Aptora Mobile II.
- Login as Administrator. Only the administrator user can access the following automated email setup options.
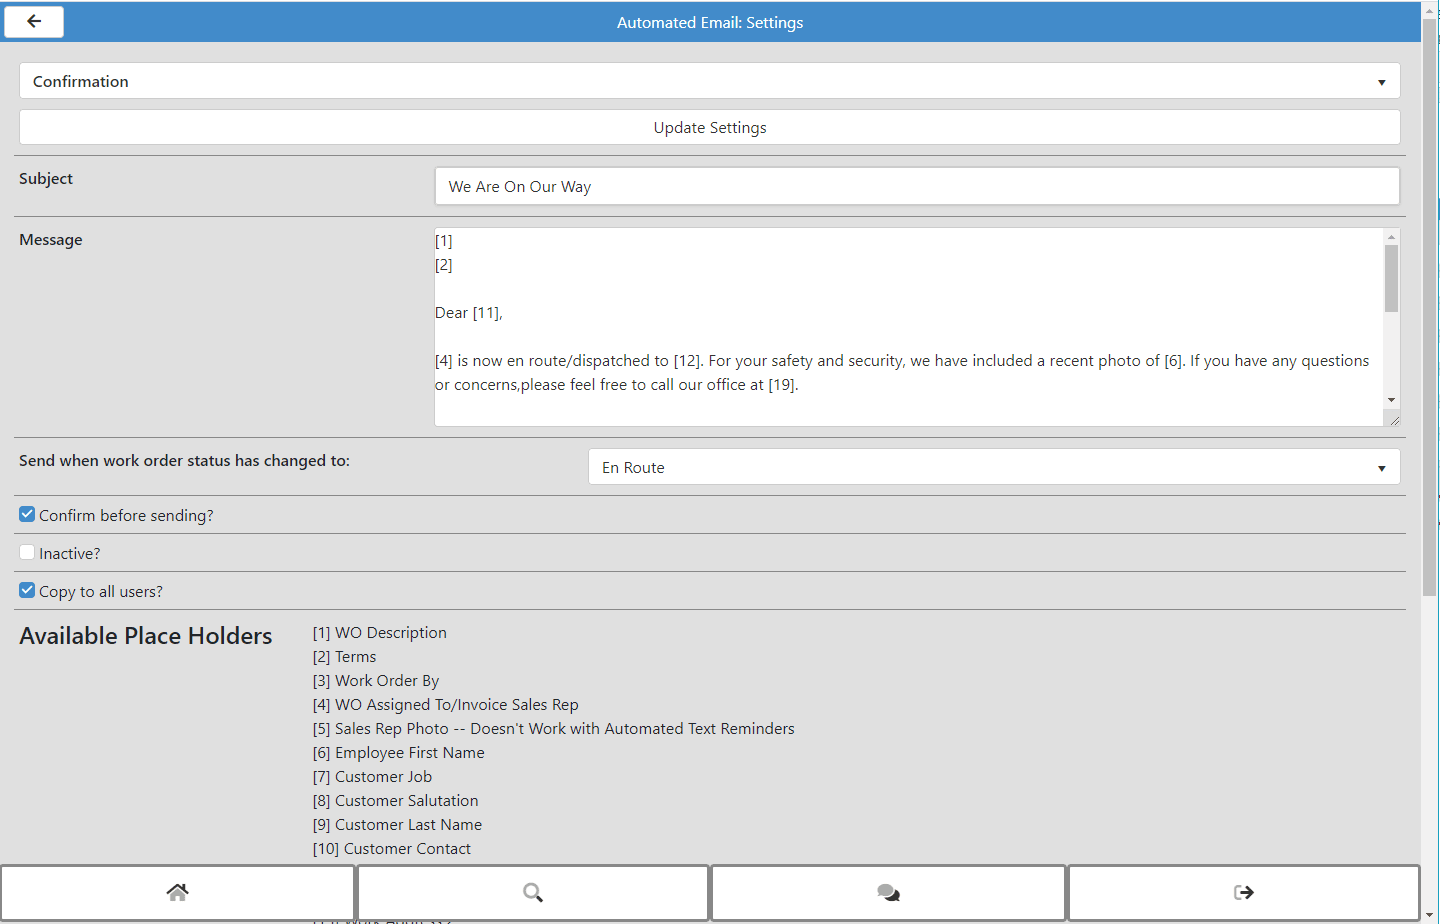
- From the Dashboard, click More | Settings | Automated Email.
- There is a selection box at the top. Select from Confirmation, Reminder, and Thank You. Pick one to customize. Confirmation is set as the default.
- Setup the email message template. Use the Available Place Holders to allow for information to be automatically inserted into your text.
- Click the Update Settings button.
- Repeat the same process for the other templates.
Options
- Sent when work order status has changed to: – Select from the drop down menu when to send the message. The selection will change based on which template is being modified.
- Confirm before sending? – Tick this box to confirm the customer’s email address prior to sending.
- Inactive? – Tick this box if you no longer want to use the selection.
- Copy to all users? – Tick this box to have the message be consistent among all mobile users.
Related Content
https://www.aptora.com/help/mobile-ii/aptora-mobile-ii-auto-email-part-2-of-2-usage
https://www.aptora.com/help/mobile-ii/how-to-setup-automated-texting-to-aptora-mobile-ii

