

Introduction to Mobile App Work Orders
Aptora Mobile II – Work Orders is one of the more important elements to the field service technician. Aptora Mobile II gives users all the control they need when working with their Work Orders.
Work Orders can be both viewed and edited. Additionally, users can print, email, capture signatures, and create Invoices from their Work Orders.
Form Access
-
From the Dashboard, click Work Orders or

-
From the Dashboard, click Hamburger Menu| Master Lists | Work Orders.

Usage
Icons
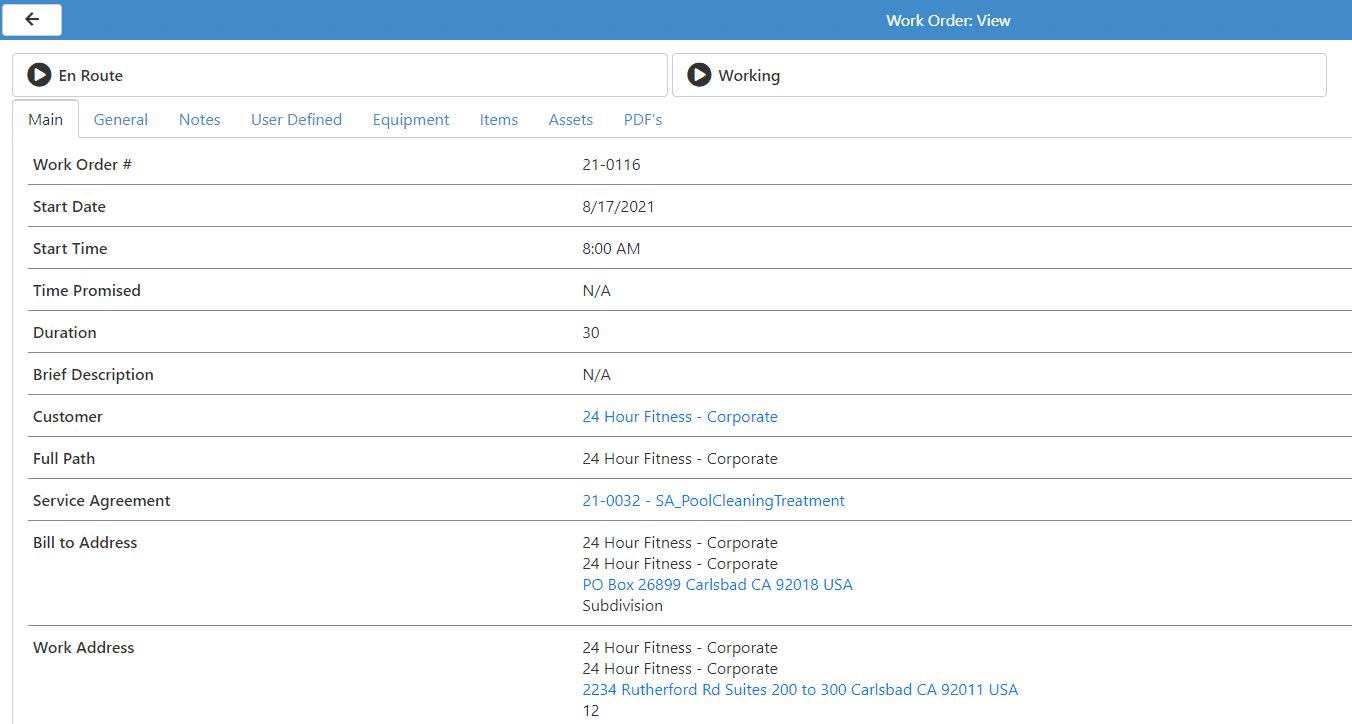
When you open a Work Order, you will immediately notice basic information displayed at the top with several expandable tabs below to view other information. When viewing a Work Order, the upper right corner offers a Hamburger Menu. The menu offers three sub-menus – General, Links, and Forms.
Hamburger Menu
General
The available options under General include: Edit, History, Contact Log, Document Links.
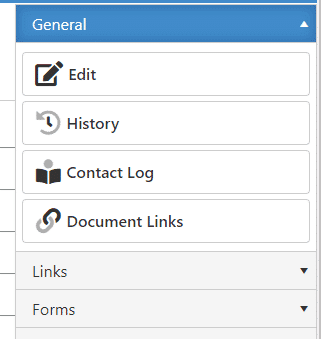
Edit a Work Order
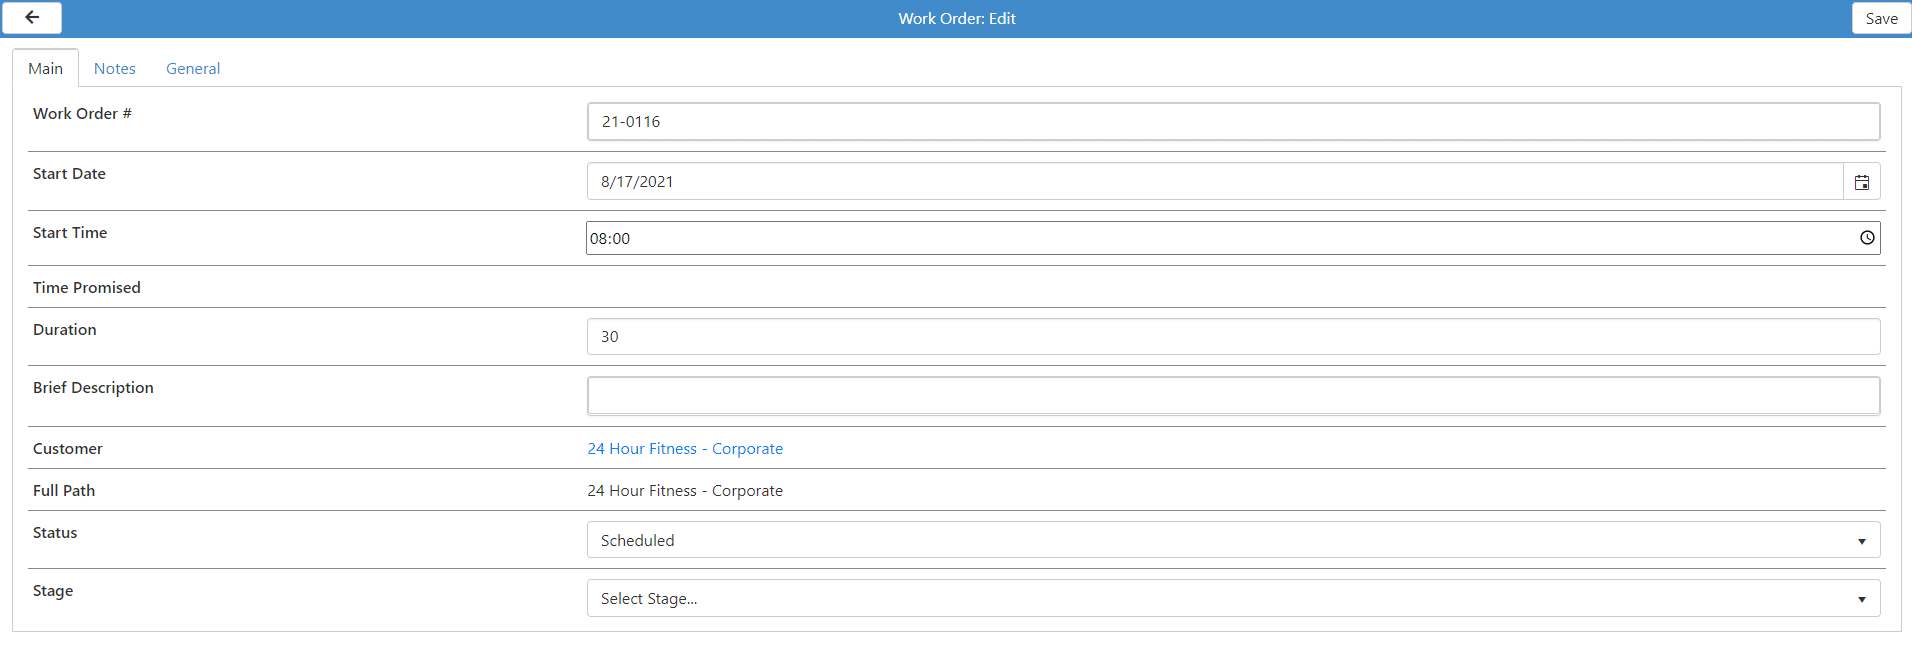
With a Work Order open, click the “Edit” button located in the top-right of the screen (above the icons) to put the Work Order in edit mode.
Editing a Work Order is necessary to perform several key tasks that are commonly done when dealing with Work Orders such as modifying the description, notes, and directions.
In addition, editing the Work Order is what allows you to manage the status of the Work Order (e.g. En Route, Working, Dispatched, etc.) and is necessary to mark the Work Order as “Completed”.
You may also modify several other key elements such as Items, Start Time, and Duration. To do so, click each section’s tab and make changes as necessary.
Once you are finished making your changes, click the “Save” button at the top-right of the screen.
History
The History button allows technicians to view the History within Total Office Manager for the Customer:Job associated with the Work Order. Available options include: Invoices and Sales, Estimates, Timesheets, and Purchase Orders.

Contact Log
The Contact Log button allows for additional entries to be entered by a technician in Aptora Mobile II. Click the Hamburger menu and select “Add” to create an entry.
Document Links
To view all document links associated with the Work Order select this button.
Links
At the top-right of the screen you will see several important icons for use with your Work Orders. When you click the Hamburger menu, the following are present under ‘Links’.
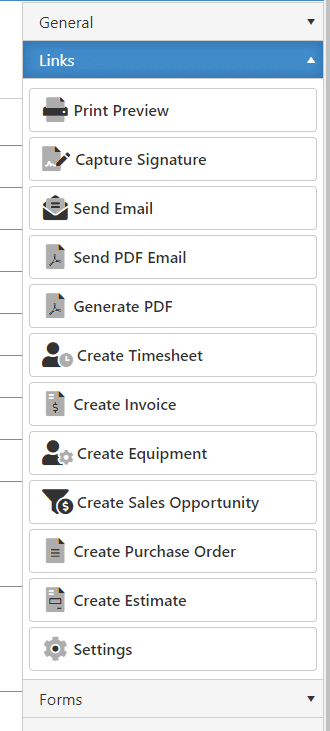
- Print Preview – Open the Work Order in a print-friendly format.
- Capture Signature – Capture a digital copy of a customer’s signature for the Work Order.
- Send Email – Send the Work Order as an Email. Email setup required.
- Send PDF Email – Transforms the Work Order into a PDF attachment with the option to send an email.
- Generate PDF – Transforms the Work Order into a PDF for viewing.
- Create Timesheet – Click to complete a manual timesheet entry for the work performed.
- Create Invoice – Create an Invoice from the Work Order.
- Create Equipment – Add a piece of equipment to the Customer:Job’s record.
- Create Sales Opportunity – Create a Sales Opportunity from the Work Order.
- Create Purchase Order – Create an Estimate from the Work Order.
- Create Estimate – Create an Estimate from the Work Order.
- Settings – Quick Access to Work Order settings.
Creating an Invoice from a Work Order
When a Work Order has been completed, a signature has been obtained, and it’s time to Invoice the Work Order.
When you are ready, open your Work Order and click the “Create Invoice” icon from the Link menu.
A prompt will appear asking if you would like to create an invoice on the current work order?” Click “Yes” to confirm your request.
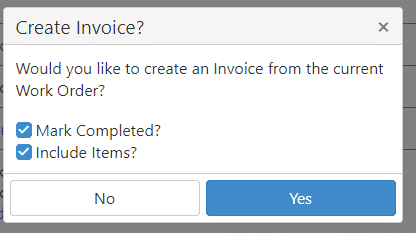
The correct Customer:Job, address information, items, department, etc., will be automatically added to the Mobile Invoice that is generated.
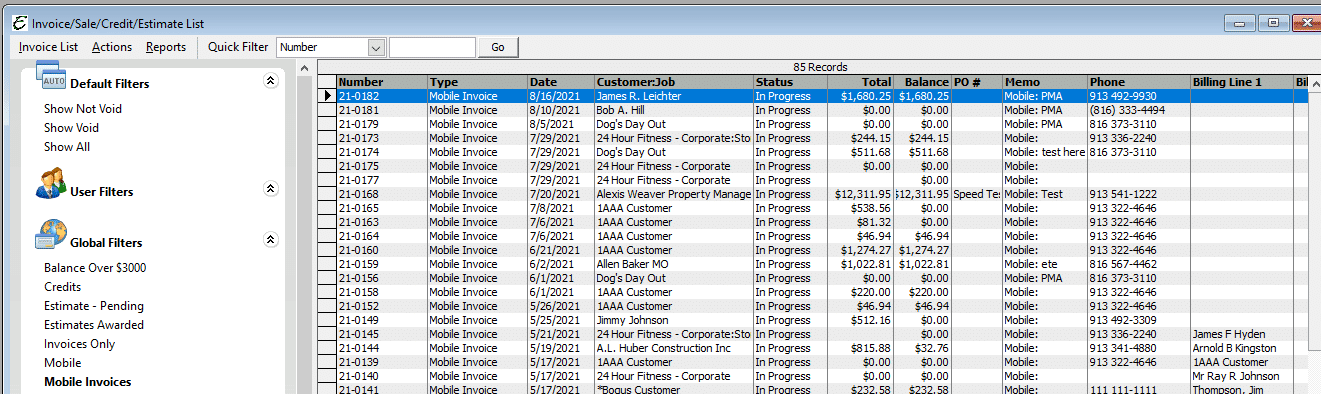
Mobile Invoices will appear in a special list in Total Office Manager for you’re A/R specialist to confirm and submit as a regular invoice for billing.
Approving Mobile Invoices in Total Office Manager
Invoices created in Aptora Mobile II will be designated in Total Office Manager as a new type called Mobile Invoice. Mobile Invoices and payments accepted in Aptora Mobile II do not directly affect Accounts Receivable (A/R), Income, COGS, or other accounts.
Mobile Invoices must first be approved and converted into a standard Invoice in Total Office Manager. All Invoice validation remains the same, including preferences such as those requiring a Salesman, Department, or Sales Tax Item.
-
To approve a Mobile Invoice, simply open the Mobile Invoice in Total Office and save it. It is recommended to set up a user filter to sort out only Mobile Invoices within the list.
-
You may make changes to this Invoice as you would any normal Invoice.
Once a Mobile Invoice has been approved all financial accounts (A/R, Income, COGS, etc.) will be affected as usual.
An Invoice that was created from Aptora Mobile will always have the “Mobile Invoice” in the security stamp at the bottom left of the form.
Signature Capture
Aptora Mobile users can make use of the Signature Capture feature to capture an image of a customer’s signature for use when signing off on Work Orders, Invoices, or Payments.
Click the “Signature Capture” icon for the Work Order you wish to capture the signature for and then allow the customer to use your device to write out their signature with their finger or a stylus.
-
Signatures captured in Aptora Mobile can be viewed on and used on printed Invoices in Total Office Manager.
To view a captured Invoice signature, open the related Invoice and click Menu | Show Signature. A form will appear displaying the signature if one is available on that Invoice.
Related Content
https://www.aptora.com/help/work-orders/
