Adding and Editing Your Customer’s Equipment
The Customer Equipment feature is used to track customer equipment. This can include both new equipment sold to a customer as well as existing equipment they already own. This data can then be used in a variety of ways including marketing to customers who have outdated and inefficient equipment. Complete repair history can be tracked. More importantly, if a safety recall is issued on equipment you sell, that equipment and its owners can be quickly identified so corrective measures can be taken. You can place equipment on a “Watch List”. This flags the equipment for special attention.
Accessing the Customer Equipment Form
The “Add Customer Equipment” form is used to record a customer’s equipment. Multiple ways of opening this form exist. As a matter of fact, at the very moment serialized equipment is sold the user will be prompted to automatically enter the equipment into the customer’s equipment list.
Tip: When a sale of serialized equipment is made, the program asks if you would like to automatically enter the equipment into the customer’s equipment list. This feature only works with Serialized items.
Other ways of opening the Add Customer Equipment form include:
-
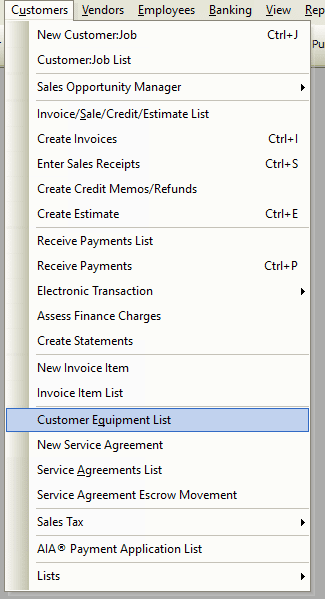
From the main menu, click Customers | Customer Equipment List then right-click anywhere in the list and select New Customer Equipment.
-
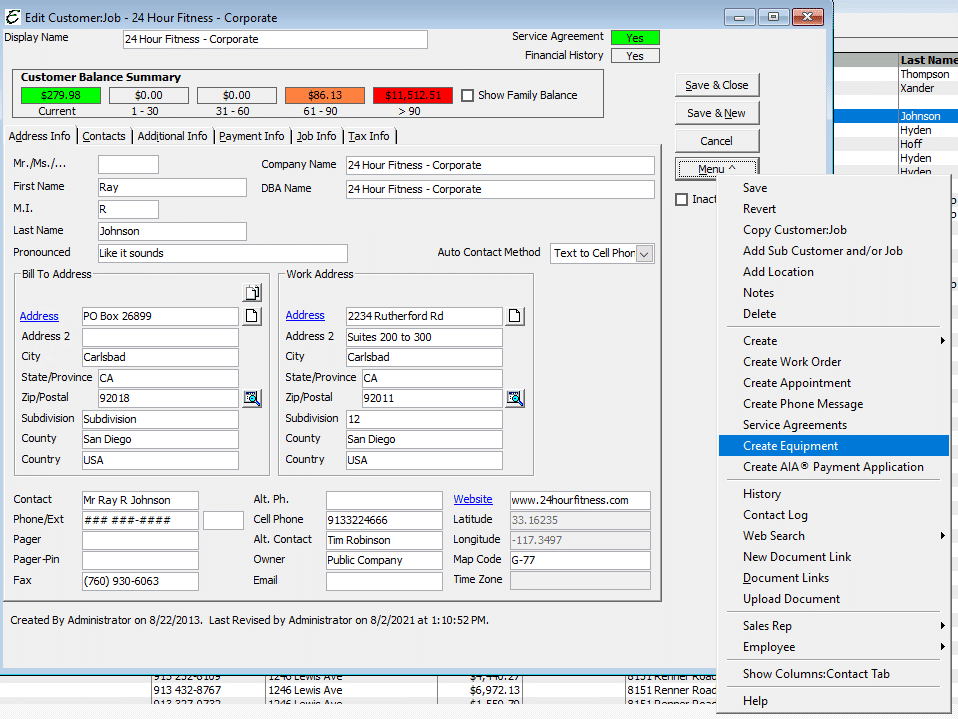
From a Customer:Job form, click Menu | Create Equipment.
-
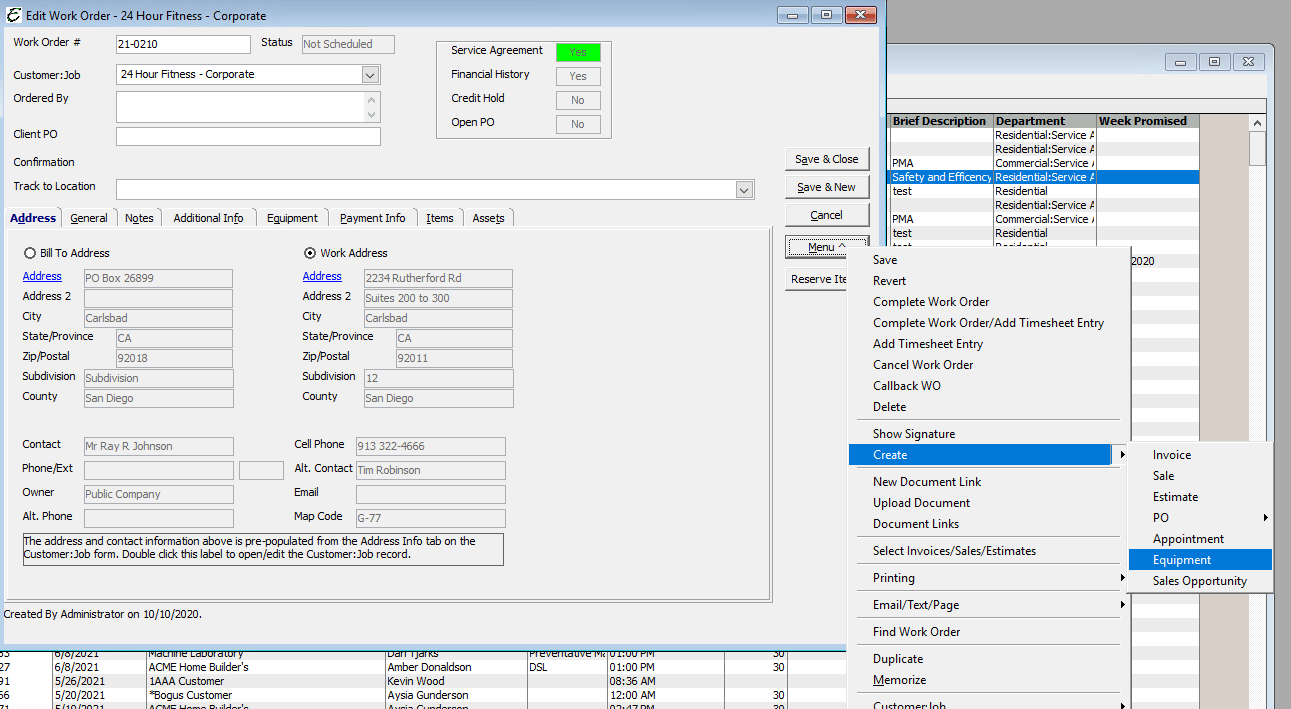
From a Work Order, click Menu | Create | Equipment.
Customer Equipment Form – Field and Button Definitions
The following is a complete list and meaning of each control, box, label, selection, and button on the Customer Equipment form.
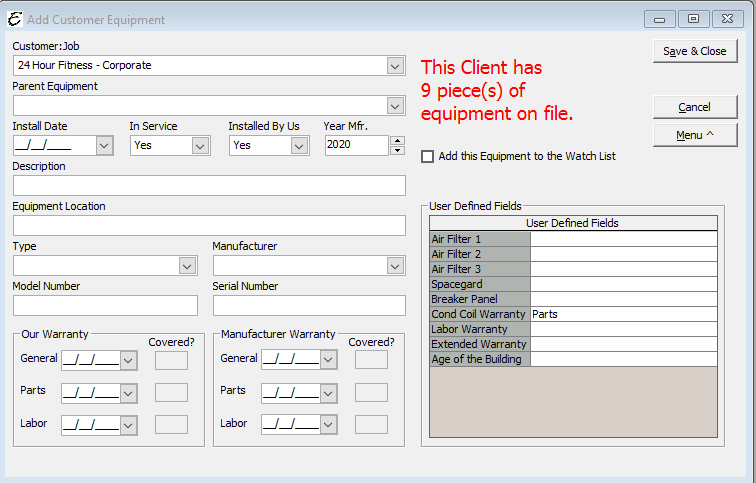
- Customer:Job: Use this field to enter the customer or job that owns this piece of equipment.
- Parent Equipment: If additional equipment already exists within the family, it will appear in this drop down menu.
- Install Date: Use this area to enter an installation date for the equipment. This is primarily used for new equipment that your company installs.
- In Service: Use this area to enter whether this equipment is in-service or not.
- Installed By Us: Select either ‘Yes’ or ‘No’.
- Year Manufactured: Use this area to enter the year the equipment was manufactured.
- Watch List. Add this Equipment to the Watch List: Tick this feature if this piece of customer equipment needs to be evaluated as a concern going forward. The Watch List feature is used to indicate that the equipment needs special attention of some type. When checked, a label will indicate who checked the box and when. You can filter the customer equipment list by Watch List status.
- Description: Use this area to enter a brief description of the equipment.
- Equipment Location: Use this area to enter the location of the equipment. (Example: North side of roof, basement, crawl space, etc.).
- Type: Use this area to enter the type of equipment. (Example: Furnace, Hot Water Heater, etc.)
- Manufacturer: The manufacture of the equipment.
- Model Number: Use this area to enter the model number for this piece of equipment.
- Serial Number: Use this area to enter a serial number of the equipment.
- Our Warranty: Use this field to enter when your warranty expires for General, Parts, and Labor.
- Manufacturer Warranty: Use this field to enter when the manufacturer warranty expires for General, Parts, and Labor.
- Save & Close: Saves and exits the form.
- Save & New: Saves then opens a new form.
- Cancel: Exits the form without saving.
User Defined Fields (UDFs)
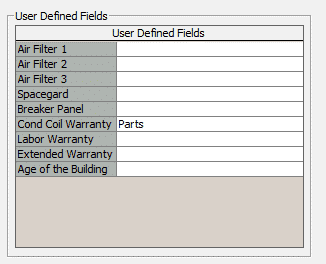
Although blank to begin with, you can easily add user defined fields as pictured above to assist with knowledge of customer equipment. For more, please read here.
Menu Functions Found on the Customer Equipment Form
- Menu | Save: Manually saves the form and leaves it open.
- Menu | Copy: Once the equipment has been saved, the function lets you create an identical duplicate record of a piece of customer equipment. It’s useful for when it might be easier to copy an original record and make a few changes to it, rather than enter all information into a blank form from scratch.
- Menu | Revert: Causes the form to dismiss any changes and return to information contained when last saved. It is the same as canceling the record without saving changes, then re-opening the record.
- Menu | Notes: Opens the notepad for that specific piece of equipment. A virtually unlimited amount of notes can be entered here. See the related topic, “Notes” for details.
- Menu | History: Stores all sales, work orders, and service agreements tied to the piece of equipment.
- Menu | Image: Opens the “Customer Equipment Image” window, used to display a digital photo of the specific piece of equipment for identification purposes and use on reports. Click the “Select” button and use the Windows® “Open” dialog box to steer the program to where the image lives. Statistics about the image are displayed in the Image Information area of Company Image window. Use the OK button to accept the image or the Clear button to delete an image from the window. See the related topic, “Images” for more info.
- Menu | Delete: Removes the record from the system.
- Menu | New Document Link: Upload a link to access the equipment.
- Menu | Upload Document: Upload a document, such as a manual. or a link to access the equipment
- Menu | Document Links: Click to view all document links associated with a particular piece of equipment.
- Menu | Create Work Order: Opens a new work order, pre-populated with the customer information and already having this piece of equipment selected.
- Menu | Web Search: Exit Total Office Manager and research the equipment on the internet.
- Menu | Customer | Customer History: Opens the customer’s history form.
- Menu | Customer | Edit Customer: Opens the Customer:Job form for the customer.
- Menu | Customer | Contact Log: Opens the customer’s Contact Log. See the related topic, “Contact Log” for more info.
Tips Related to Customer Equipment
- Ask your technicians to record the model, serial number, brand, and description of all equipment that your company works on; even if they did not service it.
- The time you spend to enter details about customer equipment will be well spent. This information can be used to market needed accessories and services to your customers.
- Avoid using dashed and spaces when entering models and serial numbers; this will make it easier to perform searches.
- When a sale of serialized equipment is made, the program asks if you would like to automatically enter the equipment into the customer’s equipment list. This feature only works with Serialized items.
- Use the Watch List (Add this Equipment to the Watch List checkbox) feature if this piece of equipment needs to be evaluated as a concern going forward. The Watch List feature is used to indicate that the equipment needs special attention of some type. When checked, a label will indicate who checked the box and when. You can filter the customer equipment list by Watch List status.
- You can select customer equipment when creating work orders and service agreements.
- You can select a piece of equipment on each line item of an invoice. This allows you to associate specific items and label with a specific piece of customer equipment.
- The Customer Equipment History Report details each piece of equipment a customer has on file with your company. The report includes a description, model number, serial number (if applicable), and warranty information. Pricing and User Defined Fields can also be included in the report, if desired.
- The Customer Equipment Custom Data View (CDV) is a list of customer equipment with details for the last work order completed, number of pending work orders, and customer demographics.


