

Introduction
This topic will teach you how to locate/merge duplicate Customer:jobs in Total Office Manager by using a batch utility for mass updating.
WARNING: This Procedure Cannot Be Undone
Additional Warnings
-
Make a backup of your database prior to using this tool.
-
If security is not turned on in Total Office Manager, anyone can use this tool and that is NOT recommended. Turn on security. Doing so will insure that only the administrator will have access to this form.
-
When merging contacts that have complex financial information, carefully check your financial statements to be sure you have not created problems. If there is trouble, you can usually correct it. If not, you can restore your backup.
Usage
Sometimes users will realize they have been maintaining two contacts that are actually the same. This may happen when you enter a customer for the first time; not realizing that they were already in Total Office Manager. This utility works by moving all information from one contact to another. This includes contact info, notes, logs, invoices, sales, credits, estimates, work orders, scheduling, checks, and more.
Use this form to scan Total Office Manager and identify duplicate contacts based on search criteria you choose. Once duplicates are identified, you can then merge them – if you wish.
Form Access
When security is turned on, only the administrator can use this tool.
-
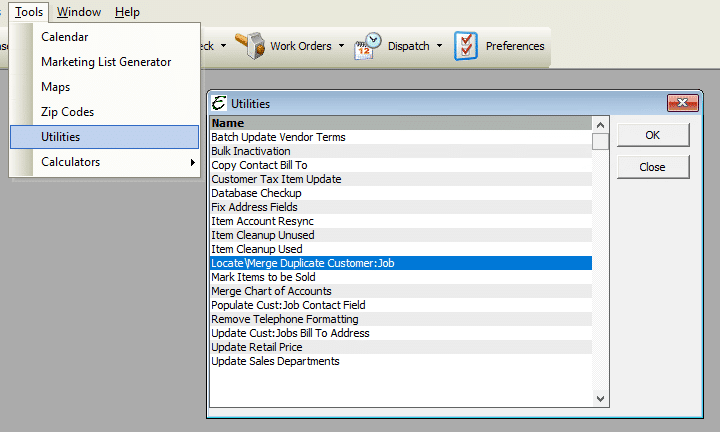
From the main menu, click Tools | Utilities. Select Locate/Merge Duplicate Customer:Job from the list. Or,
-
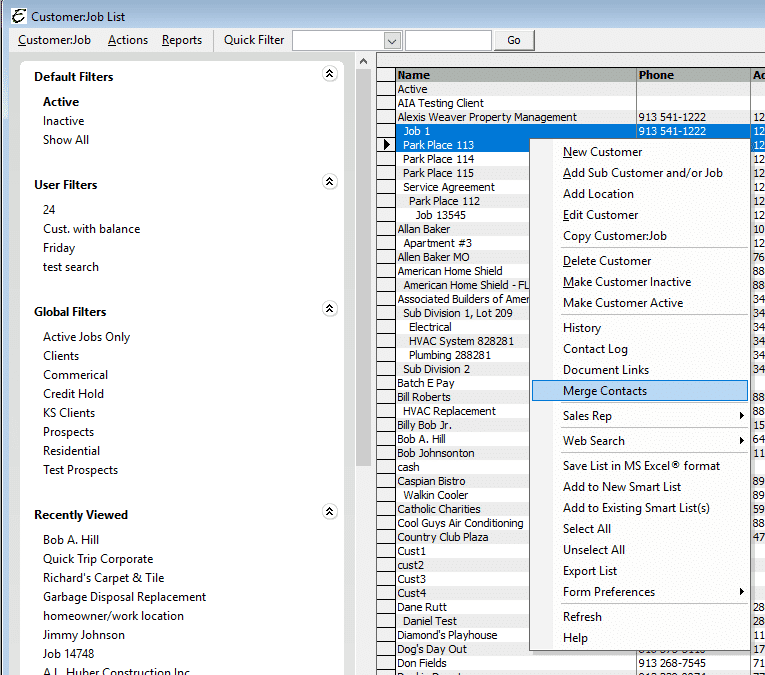
On the Customer:Job List, select two (2) or more Customer:Jobs, right-click and select “Merge Contacts”. This would be best used for modifying one customer.
Field Definitions
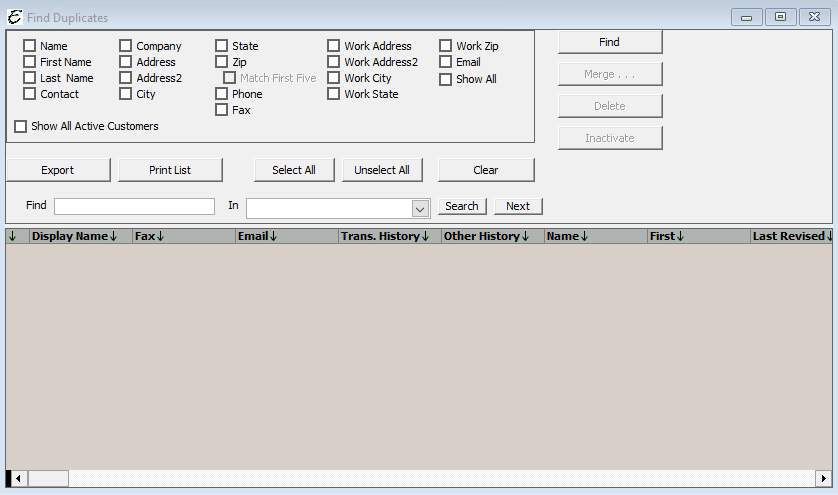
| Criteria – | Select what information you want to use to detect a duplicate. Many people use the Address or Contact. You can select several at a time.
|
| Show All Active Contacts – | Check this box to include contacts that are inactivated. |
Button Definitions
| Find – | Click this button the locate the duplicates. Experiment with different criteria until you have the results you are looking for. |
| Merge – | Click this button to open the Merge Contacts form. |
| Clear – | Click this button to clear the form. |
Merging Definitions
| Merge Selected Into – | Select the contact that the information will be merged into. This is the target. You can only select one at a time but you can do multiple merges. Note: When selected, this contacts is no longer available in the Merge Selected From list. |
| Merge Selected From – | Select one or more contacts that the information will be merged from. This is the source. |
| Delete After Merge – | Select this option if you wish to delete the contacts that have had their information moved from. This refers to the source contact (the one that has the info you want to move). |
| Make Inactive After Merge – | Select this option if you wish to inactivate the contacts that have had their information moved from. You can always delete them later. This refers to the source contact (the one that has the info you want to move). |
| Do Nothing – | Select this option if you wish to keep the contacts that have had their information moved from. This refers to the source contact (the one that has the info you want to move). This is usually not a good choice. |
| Show Inactive – | Check this box to show contacts even if they have been inactivated. Display inactive contacts. |
| Merge Contact Info – | Check this option if you wish to copy the address information from the source to the target. This is a good option if the source has the most current contact info. |
| Merge (button) – | Click this button to perform the actual merge. It’s recommended that you do a backup first! |
Step-By-Step – Locate/Merge Duplicate Customer:Jobs Utility
You will search for duplicates using the Find Duplicate form. You will then select a customer to merge others into. This is called the “target” contact. You will then select the contacts that have information you wish to move. These are called the “source” contacts.
- Be sure that you have a good backup before you use this tool.
- The first step is to search for the duplicates using the Find Duplicate utility.
- Once duplicates are located, click the Merge Duplicate button. The Merge Contacts form will open.
- At the top of the form, select the contact you wish to merge other contacts into.
- On the lower potion of the form (the source list), this contact becomes bold and you will not be able to select it.
- Check each contact that you wish to move information from. You do this by checking the small box on the left side of each contact.
- Select an option indicating what you wish to happen to contacts once their information has been moved. We recommend that you inactivate them. Later, when you are sure everything is ok, you can delete them.
- Click the Merge button when you are ready to do the merge.
Tips
- When security is turned on (in Preferences), only the Administrator can use this tool. That’s is because generally users should not be allowed to merge contacts.
- This form does not close when you click the merge button. You can perform multiple merges.
- If you discover duplicates using another form (like the customer:job list), you may consider adding something in the contact or address 2 field (like XXXX) to help you located them later with this form.
- Use this help topic should a customer move. Copy Customer – Customer Moved.
Related Content
