
Introduction
The Reminder List is used to create and manage reminders for users in Total Office Manager. Think of each reminder as a tool which, once setup, is then used to produce reminder items. It is the reminder item that users are ultimately notified about when logging in to the system, or seen in the information center. Even after all reminder items have been dismissed or otherwise dealt with, users can return to the original reminder (tool) to create more reminder items.
Form Access
-
From the main menu, click Company | Reminder List.
Usage
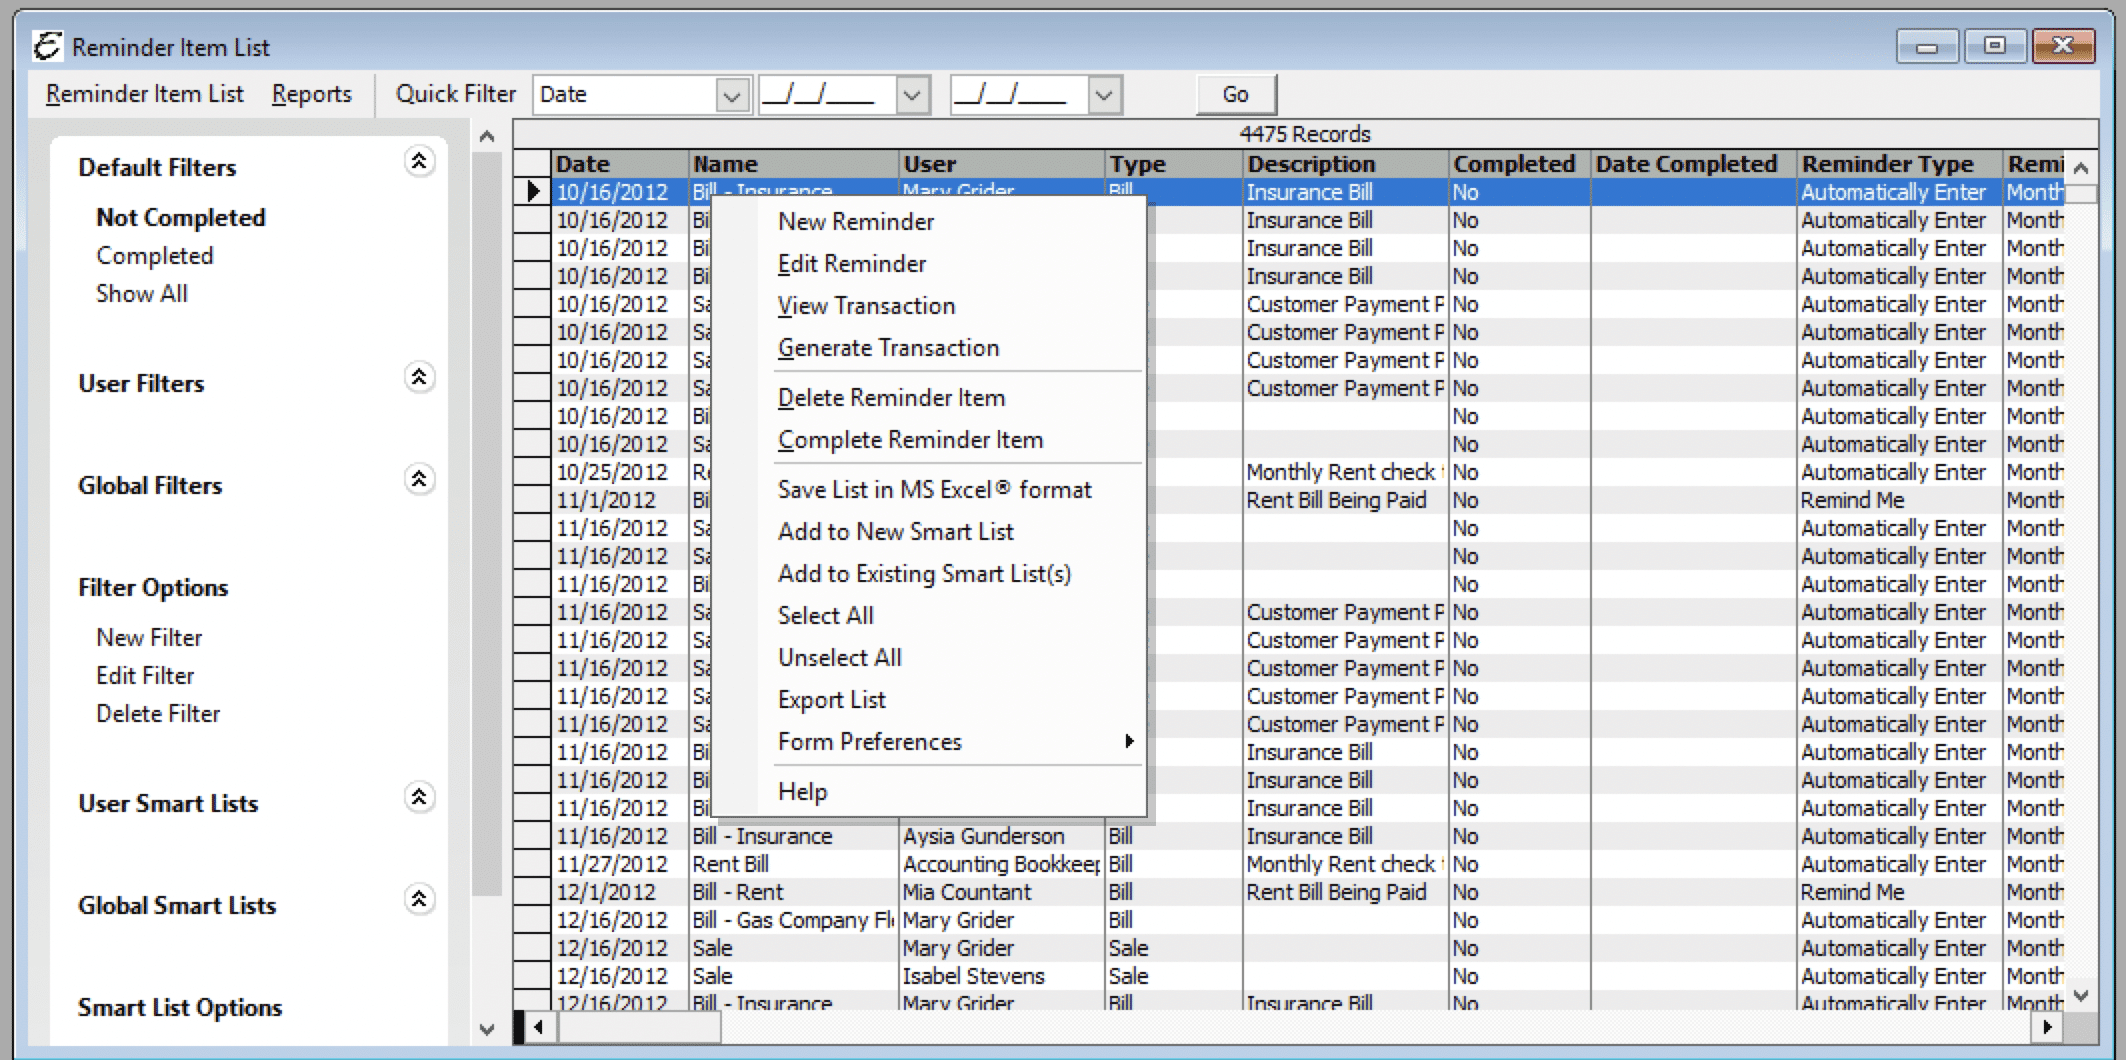
Perhaps the easiest way of using the commands available in this list is through its right click menu.
- To create new reminder, right-click anywhere in the list and choose New Reminder from the pop-up menu.
- To edit a reminder, right-click on it and choose Edit from the pop-up menu.
- To delete a reminder, right-click on it and choose Delete from the pop-up menu. Note: It may not always be possible to perform this action — inactivation may be more appropriate.
- To export whatever information is currently displayed in the list, right-click anywhere in the list and choose Export List from the pop-up menu.
Creating a New Reminder
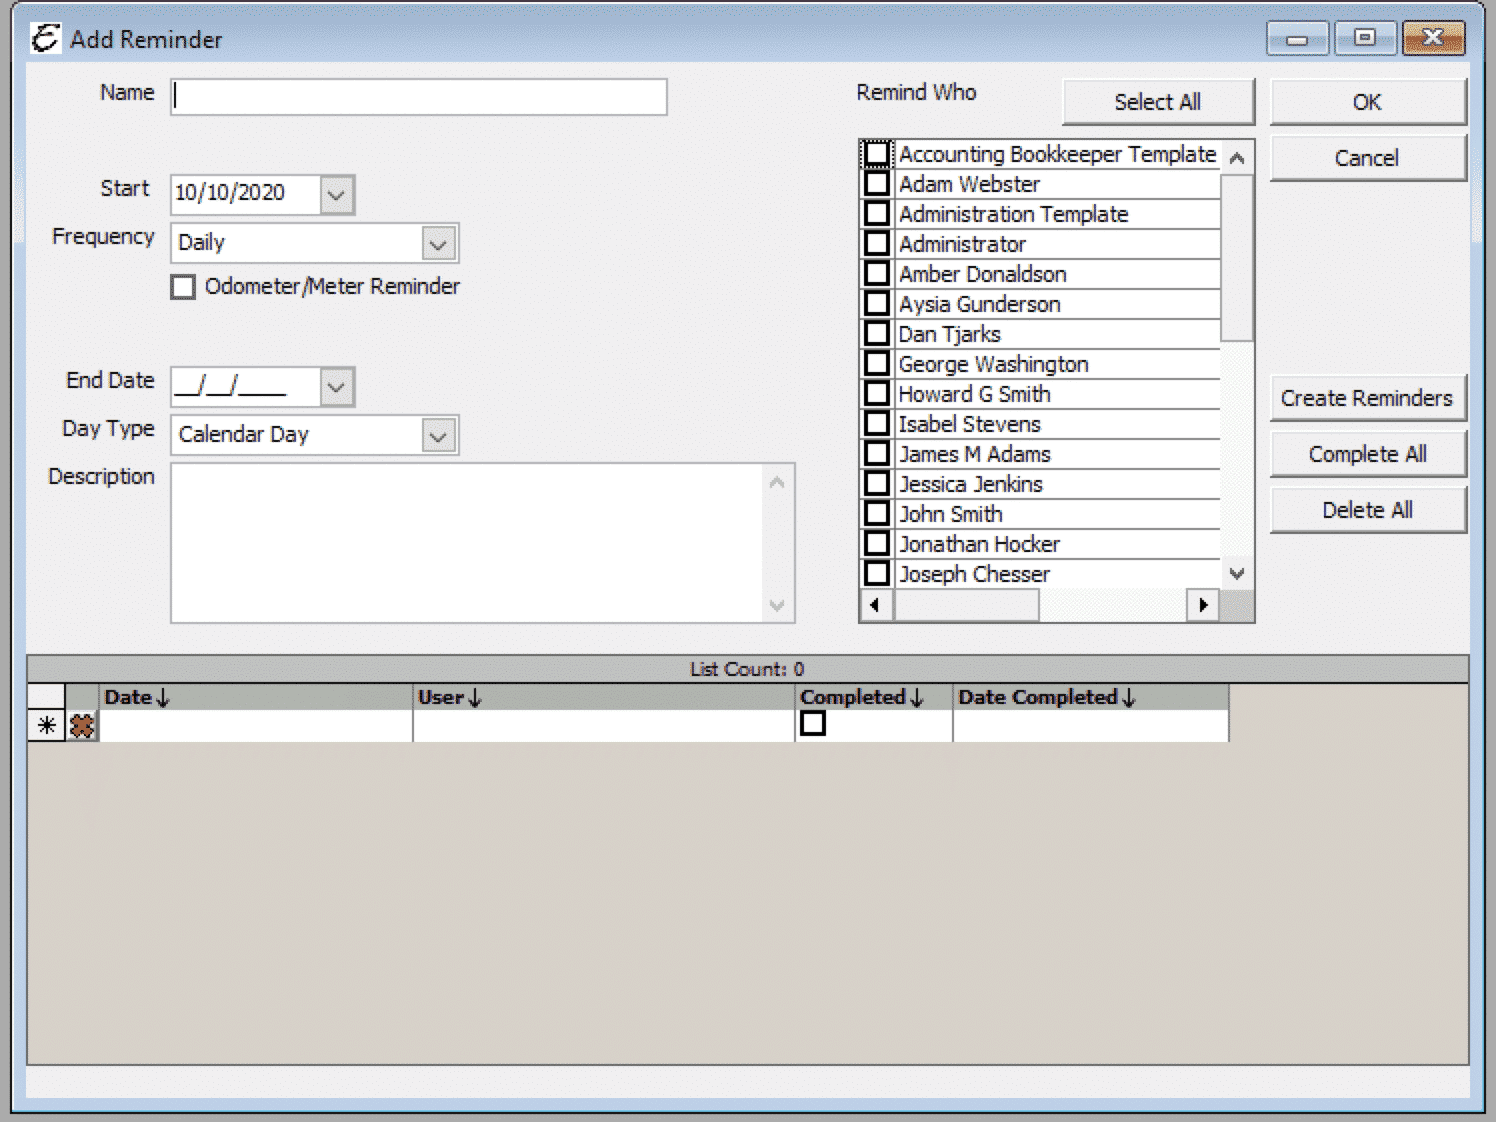
- Right-click anywhere in the Customer Type list and choose New Reminder from the pop-up menu. The “Add Reminder” form will appear.
- Enter a name for the reminder in the “Name” field.
- Select a “Start” date.
- Select a “Frequency”. The choices are:
- Daily
- Weekly
- Every Two Weeks
- Monthly
- Every Two Months
- Quarterly
- Bi-Annually
- Tri-Annually
- Annually
- Select an “End Date”.
- If the reminder is to occur only once, the start and end dates will be the same.
- Select a “Day Type”. The choices are either “Calendar Day” or “Next Business Day”.
- Pick “Next Business Day” to ensure the reminder happens on a week-day (Monday – Friday).
- Enter a “Description” if necessary.
- Check the checkbox next to each person to remind. The “Select All” button checks the checkbox for everyone in the “Remind Who” list.
- When ready, click the “Create Reminders” button. Individual “Reminder Items” will appear in the grid at the bottom of the form. These reminder items, along with all others, also appear separately in the Reminder Item List.
- To mark Reminder Items as complete from within this window, check the “Completed” checkbox (the Date Completed field will automatically populate with today’s date).
- The “Complete All” button checks all checkboxes in the list. Note: this is only one of several ways to complete reminder items.
- The individual reminder items can be edited as necessary. Adjust the date and user of a reminder item freely. Remember, the reminder itself is sort of a tool, used to create either a single or a large batch of reminder items.
- If it is ever necessary to erase all reminders from the list, the “Delete All” button will remove all with a single click.
- When finished, click the “OK” button to exit the form.
Editing or Deleting a Reminder
Follow these instructions to delete or edit a reminder.
- Click Company | Reminder List
- Right click on the Reminder you wish to work with.
- Select Delete to delete the Reminder. Select Edit to make changes to an existing Reminder.
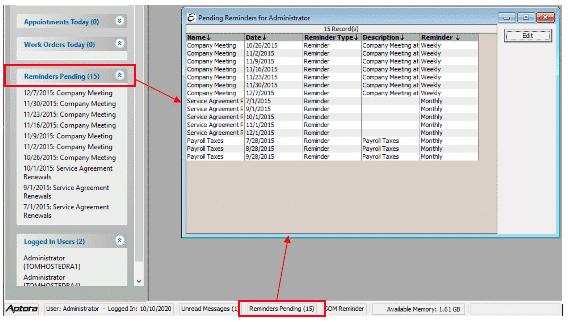
Viewing A Reminder
Reminders can be clicked on from within the status bar or the information center. When clicked, a list of all pending reminders will appear for the user to review.
Tips
- Don’t confuse reminders with appointments. They are both handy and appear to have the same function, but there are differences. Appointments are day and time specific. Reminders are day specific only — not time specific.
Related Content
https://www.aptora.com/help/reminder-items-list/

