Introduction
A small business may choose to use a line of credit to cover short term cash shortages. Lines of credit can take many forms. Generally, a company makes a request to borrow money against its line of credit via fax or email. The money is then electronically deposited into the company’s bank account. The business may pay interest only or a combination of interest and principle monthly. These payments are typically made electronically by the bank per the company’s request, and no checks are sent or received. When this happens, a company will need to set up a loan or a line of credit within Total Office Manager.
To set up a line of credit to show interest expenses and principle payments, follow the steps below that best suit your needs:
Note: The accounts used here are for illustrative purposes only. Please consult your accounting professional for the exact accounts to use.
Form Access
-
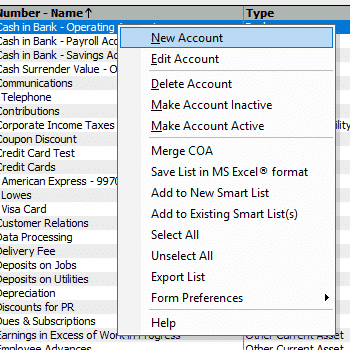
From the main menu, click Banking | Chart of Accounts List. Right-click anywhere in the list and select New Account from the fly-out menu.
Field & Button Definitions
Create a long-term liability account to track what you owe:
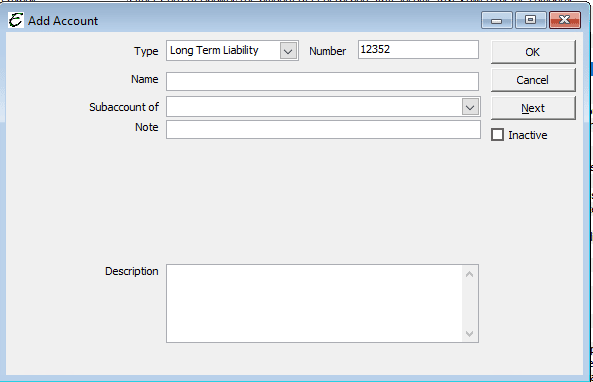
- Type – Choose Long Term Liability as the account type.
- Number – This number can be auto-generated by Total Office Manager, or you can choose to input your own reference number for this account.
- Name – Enter an appropriate name (“Line of Credit” for example) for this account to track the liability.
- Subaccount of – This is not a subaccount, so leave this field blank.
- Note – Enter any appropriate notes regarding the chart of account.
- Description – Enter any description you feel necessary to describe this account and its purpose.
- Inactive – This checkbox should remain unmarked as long as this account is active.
Once all fields have been filled out, click the Next button to set up the next account.
Create an account to track interest payments (expenses):
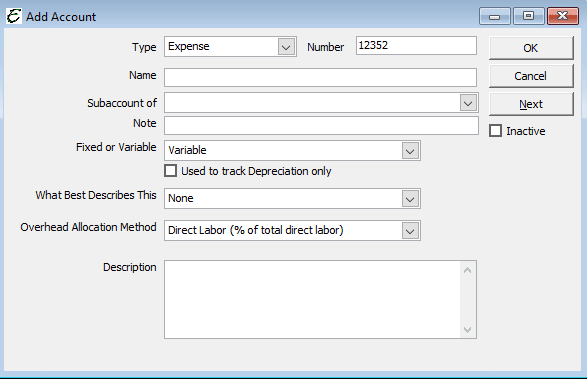
- Type – Select Expense from the drop-down menu.
- Number – This number can be auto-generated by Total Office Manager, or you can choose to input your own reference number for this account.
- Name – Enter an appropriate name (“Line of Credit – Interest” for example) for this account.
- Subaccount of – This is not a subaccount, so leave this field blank.
- Bank Acct. No. – Enter the number of the bank account, if applicable.
- Opening Balance – Leave this field blank.
- As of – Leave this field blank.
- This Account is Used for Inventory Purposes Only – Leave this checkbox unmarked.
- Description – Enter any description you feel necessary to describe this account and its purpose.
- Inactive – This checkbox should remain unmarked as long as this account is active.
Once all fields have been filled out, click the OK button to close the window.
Depositing money from your line of credit:
To deposit the money that has been borrowed against your line of credit into the company’s bank account, follow these instructions:
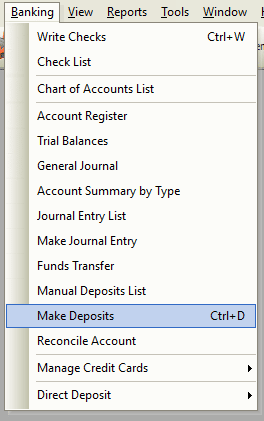
- From the main menu, select Banking | Make Deposits, or use the keyboard shortcut Ctrl + D to open the Add Deposit form.
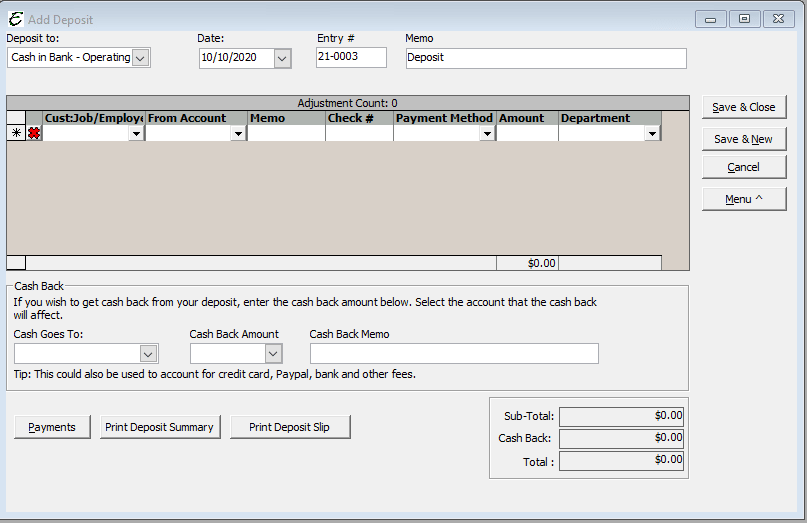
- Deposit to – Select the bank account into which your bank will transfer the money.
- Date – Enter the date of the actual transfer.
- Entry # – Enter some type of code in this field that relates to the transaction. One recommended option is to enter the letters “ACH” followed by a transaction number. This can be the current date, your loan request number, a number assigned by the bank, or an internal number.
- Memo – Enter notes in this field explaining the source of the loan and any other pertinent information necessary.
- Received From – Select your Bank from the drop-down menu. Your bank should already be set up as a vendor. If your bank is not set up as a vendor, use the <Add New> option, to create an account for your bank.
- From Account – Select your new account “Line of Credit”.
- Memo – Enter any notes you feel are necessary in this area.
- Check # – If the funds were received in the form of a check, enter the number of the check in this field. Otherwise, you can leave blank or enter another number/code for internal purposes.
- Pmt Meth. – Select the appropriate payment method type from the drop-down menu. If the transaction is paperless, it is recommended to use “ACH”. These letters indicate that this was an electronic transaction.
- Amount – Enter the amount of the loan in this field.
- Dept. – Enter the department that will receive the funds, if applicable. Otherwise, leave blank.
Double check your work, and then click OK.
Once these steps have been completed, the money borrowed from the line of credit will appear in the company’s bank account, and the transaction will be set up as a Long Term Liability.
Make an interest or loan payment:
When scheduling the repayment of a Line of Credit against which your company has borrowed, it must first be determined whether the payments will be interest payments or payments against the principle (the money borrowed). Typically, banks will automatically withdraw money from a company’s bank account each month to cover interest charges. This section explains how to record that event:
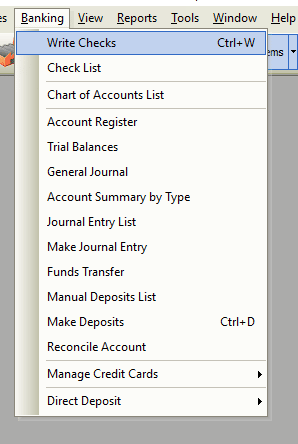
- From the main menu, select Banking | Write Checks or use the keyboard shortcut Ctrl +W to access the Write Checks form.
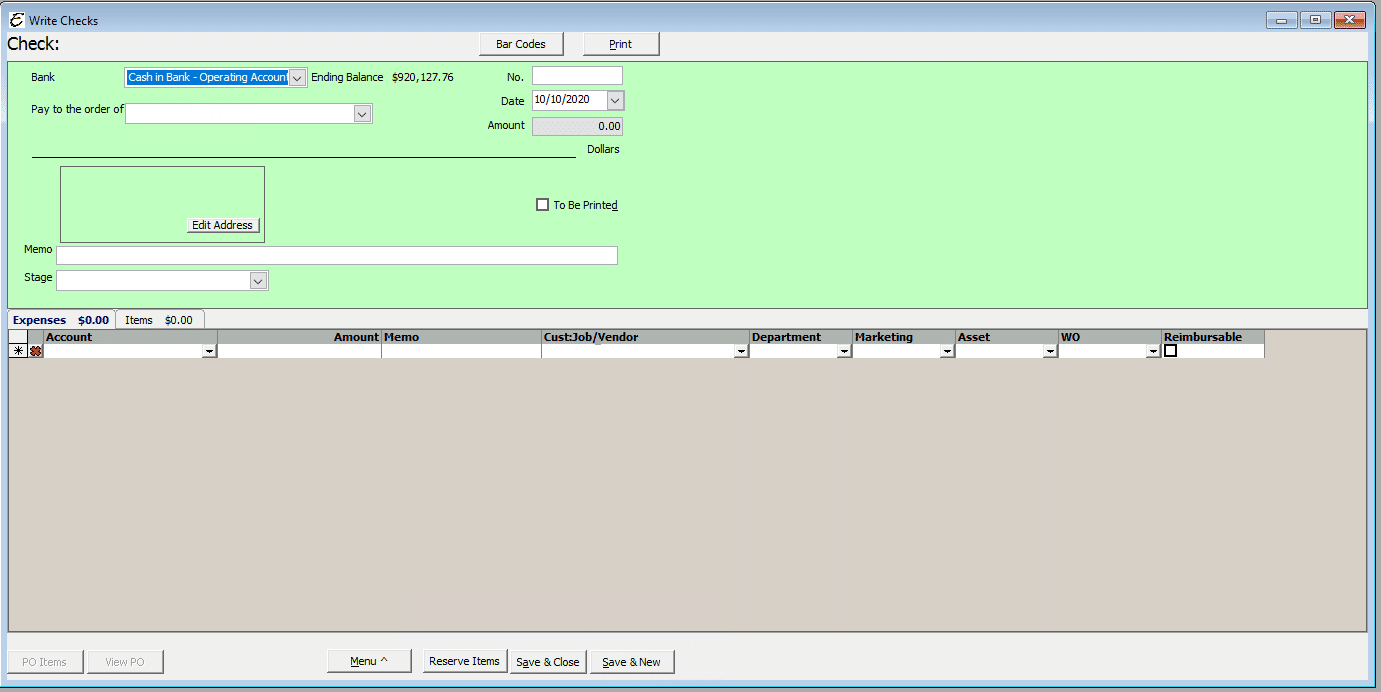
- Bank – Select the account from which the payment will come.
- Pay to the order of – Select the institution that holds the company’s Line of Credit and to which the payment will be sent.
- No. – Enter an internal code for the ACH transaction. One recommended option is to enter the letters “ACH” followed by a transaction number. This can be the current date, your loan request number, a number assigned by the bank, or an internal number.
- Date – Enter the date of the actual transfer.
- Memo – Enter a memo explaining the payment, etc.
On the Expenses tab:

- Account – Select “Line of Credit – Interest” account. When making a payment against the principle (the loan amount), select the Line of Credit account.
- Amount – Enter the amount of the interest paid. The interest amount will be shown on the company’s bank statement or recorded as a transaction on the bank’s website. When making a payment against the principle (the loan amount), enter the principle payment amount.
Double check your work, and then click Save & Close.
The above actions (less the last two steps) will increase the interest expenses on the company’s Income Statement. If the payment was for the principle, the Line of Credit amount (on the Balance Sheet) will be lowered.
Tips
- Smart Account Filtering is a safety feature in Total Office Manager. When Smart Account Filtering is enabled, only proper account types appear as options, which eliminates the mistake of selecting improper account types for a given transaction. This preference may need to be disabled (turned off) in order to see the “Line of Credit” account in the Make Deposit form and the Write Check form. This option is found on the Chart of Accounts tab of the Preferences form (Edit | Preferences).
- If, after receiving the company’s bank statement, it is found that the interest paid differs from the interest due, the check can always be edited to reflect the correct amount. Adjustments can also be made as Journal Entries, but Adjusting Journal Entries are typically not recommended


