
Introduction
The Vendor Form – Overview reviews the form used to setup new vendors in Total Office Manager. The Vendor form holds all the contact and general information for those specific vendors.
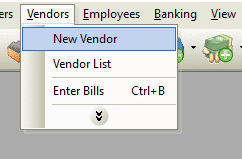
Form Access
-
From the main menu, click Vendors | New Vendor, or
-
From the toolbar, click the Add New Vendor button.

Vendor Form – Overview – Usage
Address Info Tab
The Address Info Tab is used to store basic contact information including billing address, phone/fax/cell numbers, email & website addresses, and more.

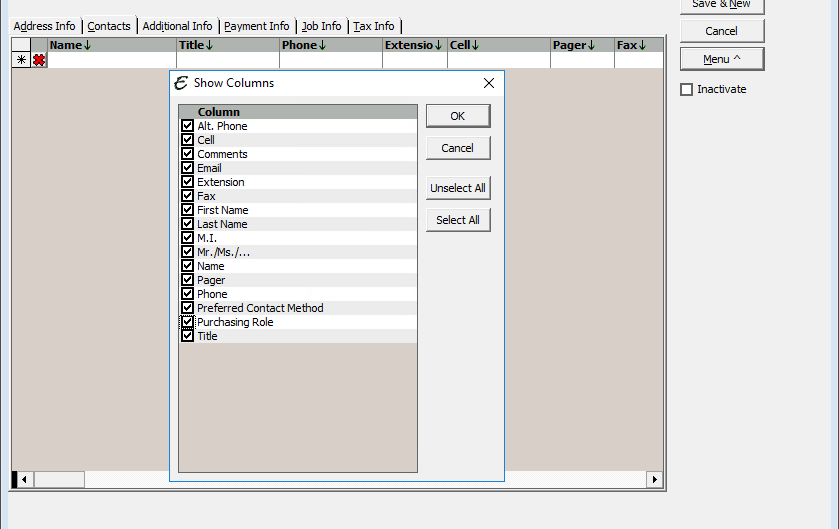
Contacts Tab
The Contacts Tab is used to record additional contacts related to the vendor. A virtually unlimited number of additional contacts can be stored in the Contacts tab.
Additional Info Tab
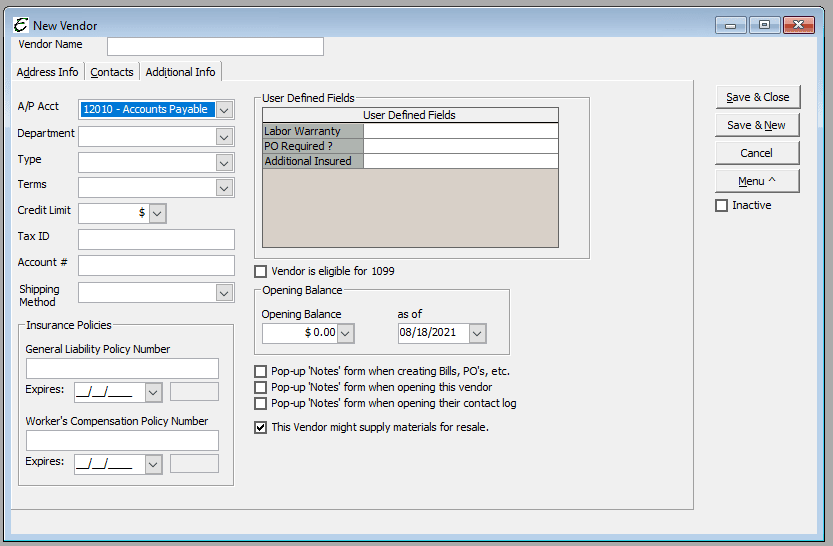
The Additional Info Tab is used for other vendor information including vendor type, default A/P account info, the payment terms offered by the vendor, a credit limit amount, Tax ID information and more. This is where control over pop-up notes for the vendor is held. User Defined Fields for vendors appear in the Additional Info tab.
Common Field & Button Definitions
Certain fields and buttons are always available in the form, regardless of the tab being viewed. Note that some of the Menu button commands are not available until the form is saved once.
- Vendor Name – The name of the vendor is displayed here. It usually takes on information gathered from the Company Name field (or the Mr./Mrs./…, First Name, M.I., Last Name fields), but it can be edited manually if required.
- Save & Close – This button saves any information and exits the form.
- Save & New – This button saves any information, then open a new form ready to be filled in with another vendor’s information.
- Cancel – This button exits the form without saving any information.
Menu Button Commands
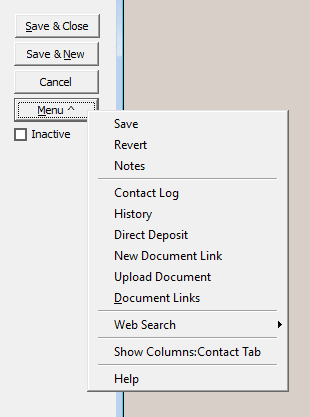
- Menu | Save – Manually saves the form.
- Menu | Revert – Causes the form to dismiss any changes and return to information contained when last saved. It is the same as canceling the record without saving changes, then re-opening the record.
- Menu | Notes – Opens the Notepad for that vendor. A virtually unlimited amount of notes can be entered here.
- Menu | Contact Log – Opens the vendor’s Contact Log, used to enter detailed notes about the account.
- Menu | History – Opens the vendor’s history form which displays every check, purchase order, bill, item receipt and more, ever involving that specific customer.
- Menu | Direct Deposit – Opens the “Direct Deposit Setup” form for the vendor, used when a vendor accepts payment via electronic ACH transactions. See the section “Related Topics” below for more information.
- Menu | Document Links – Opens the Document Links form for the specific vendor. The form behaves similarly to the company-wide Document Manager, except this view only displays documents related to this particular customer.
Other Controls
- Inactive – Tick the inactive checkbox to make the vendor inactive. This will remove the vendor from your day-to-day functions, while preserving the history in which the customer was involved.
Related Content
https://www.aptora.com/help/vendor-form-additional-info-tab/
https://www.aptora.com/help/vendor-list/

