
Work Order Form Basics – Adding and Editing
Work orders are the authorization from customers for work to be performed. This work may include service calls, maintenance, and installation. Work orders are not the same as jobs. Work orders are more short-term in nature and are the equivalent of writing a note to a co-worker instructing him/her on their next task. Jobs are projects which span a longer period of time than a work order. Work Order Form – Overview covers the essential information need to complete a work order or job in Total Office Manager.
Accessing the Work Order Form
- From the main menu, click Company | Work Order or
- Use the keyboard shortcut Ctrl+O or
- From the toolbar, click the Add New Work Order button.
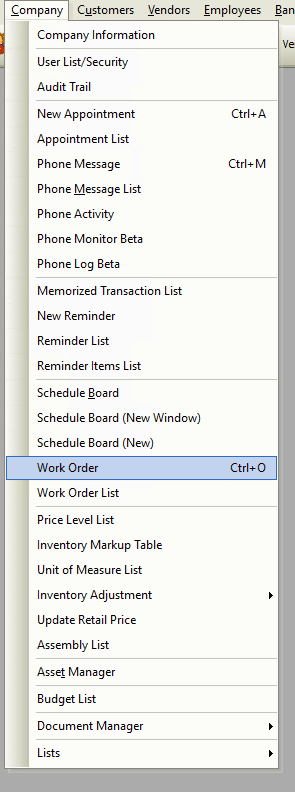
- There are many other ways to open a work order.

Work Order Field & Button Definitions
The following fields, buttons, and other controls appear in the Work Order form.
Header (top of form)
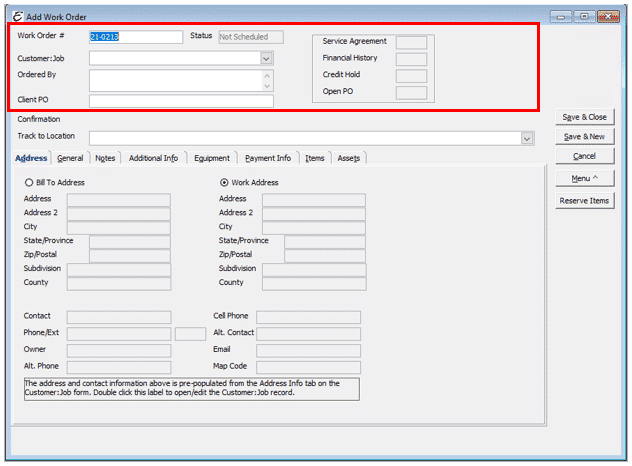
- Work Order # – Use this area to enter a number to refer to this work order. Total Office Manager will assign a WO number automatically. You can change this number if needed. Total Office Manager will warn you if the WO number has been used. Avoid duplicating WO numbers.
- Status – Displays the status of the work order (Scheduled, En Route, Working, Completed, Canceled)
- Customer:Job – Use this field to select the customer or job for the work order
- Ordered By – Use this area to enter the name of the person that ordered the work order. This could be the customer that called your company or someone in-house.
- Client PO – Use this area to enter a purchase order number. This is not your purchase order. This would be used for the purchase order of the buyer. Just like you might give a supplier your PO number, they may give you theirs.
Address Tab
This section is read-only. It cannot be edited from this form. If that is necessary, you will need to open the actual Customer:Job form.
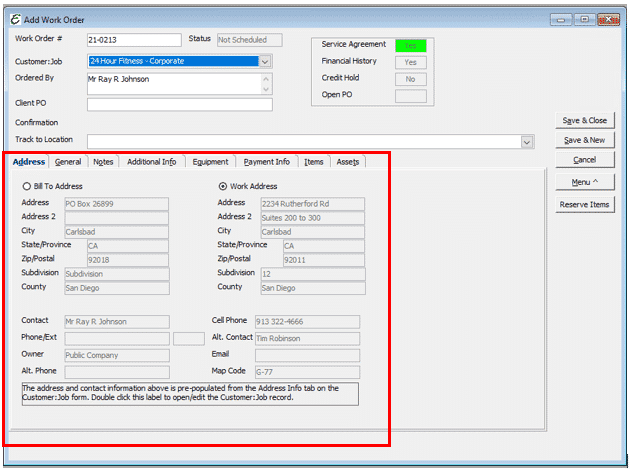
- Bill To Address/Work Address – Click to view the Bill To address or the Work Address (as entered in Customer:Job form).
- Work To Address/Work Address – Click to view the Work To address or the Work Address (as entered in Customer:Job form).
- Map Code – Displays the map code as entered in the Customer:Job form.
General Tab
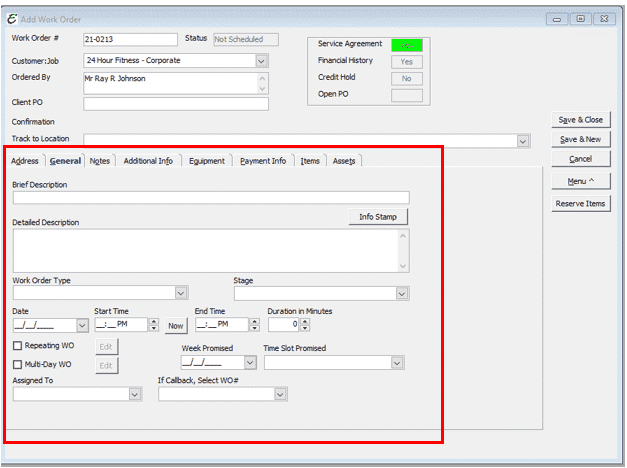
- Brief Description – Use this area for a brief description of the work to be performed.
- Detailed Description – Use this area to enter any directions or any special instructions for this work order.
- Work Order Type – Select the particular type of work order (ie: Service, Callback, Warranty, etc).
- Stage – You may use this feature for a variety of reasons. You can build your own list of stages.
- These might include Parts Needed, Parts on Order, Parts Ready to Deliver, Parts Ready for Pickup, etc.
- Date – Enter the date when the work is to be performed.
- Start Time – Enter the time of day when the work is to be performed.
- End Time – This will be filled in when you enter a duration or you can enter a value.
- Now – This button enters the current date and time into those respective fields with a single click. This feature was added as a potential time-saver.
- Duration in Minutes – This field is usually pre-populated from the default duration associated with the work order type. Most service calls should assume about 90 to 120 minutes. Override this field as necessary.
- Repeating and Multi-Day WO Option – Please see this help topic.
- Week Promised – If you only need to promise a certain week (like for non-urgent planned maintenance), select the first day of that week or select the most likely day for that week.
- Time Slot Promised – You may create a list of timeslots to offer your clients. Your list might include 8:00 to 10:00 AM, 10:00 to Noon, AM, PM, Early Morning, Late Morning, Early Afternoon, Late Afternoon, etc.
- Assigned To – Choose the technician in which to assign the work order. If the skills checking feature for the employee has been enabled, a warning will appear if the technician is not qualified for that type of work order (see the related topic, “Employee – New Employee Setup” for more information).
- If Callback, Select WO # – If this work order is a callback, you should select the original work order that this pertains to. Do not reuse the work order.
Notes Tab
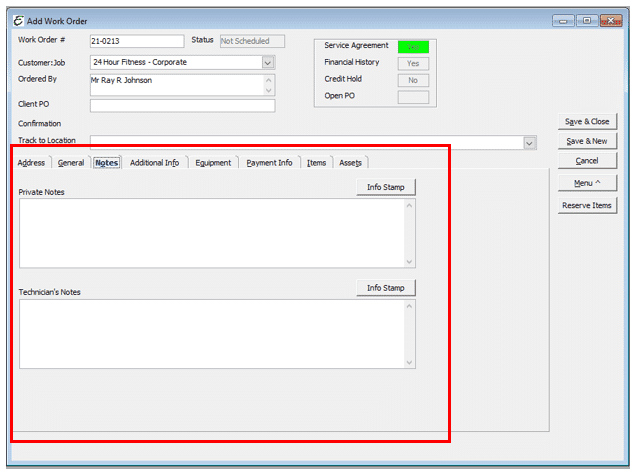
- Private Notes – These are notes that will never be printed, emailed, or exported. You can be confident that your client will not see these notes.
- Technician Notes – Opens the notepad for that work order. A virtually unlimited amount of notes can be entered here.
- Info Stamp – Press this button to recorded the logged in user’s comments with a date and time recording.
Additional Info Tab
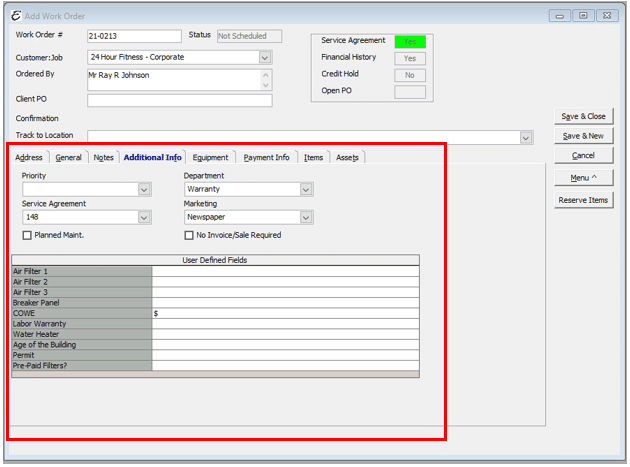
- Priority – Assign a priority to a work order. Your options are High, Medium, and Low.
- Service Agreement – Customers may own more than one service agreement. Use this drop-down list to choose a service agreement to associate with the work order.
- Planned Maint. Checkbox – Tick this checkbox to manually mark this work order as counting for one of the planned work orders from the selected service agreement.
- Department – Pulls the default department from the Customer:Job or select from the drop down list.
- Marketing – Pulls the default marketing method from the Customer:Job or select the marketing effort which generated this work order from the drop down list.
- No Invoice/Sale Required – Your work order list includes a field called “Invoice Yes or No”. If you check this box if you do not need to create an invoice for this work order. This should be rare though. You can associate two or more work orders with an invoice. Even if there is no charge, we recommend that you create a fully itemized invoice zeroed out with a discount item.
- User Defined Fields – Displays custom information fields set to appear in the Work Order form (see the related topic, “User Defined Fields” for more information).
Equipment Tab
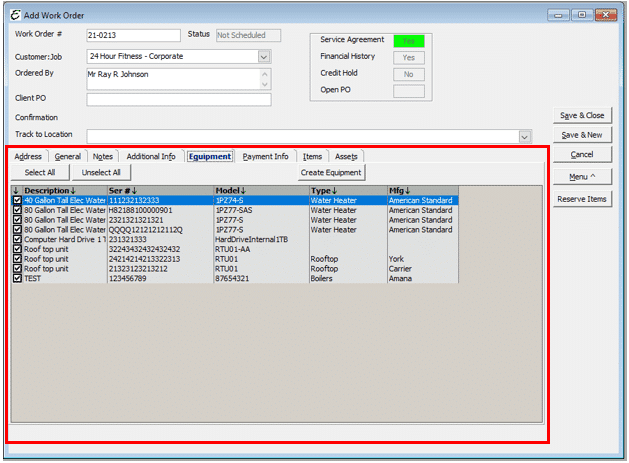
- This tab will include a list of the client’s equipment that is on file. You can check off the equipment the technician will be working on. You may not know what equipment to select. Technicians can also do this in Aptora Mobile II.
- The equipment you check will be the equipment shown in the Aptora Mobile II work order. Mobile users can add equipment to this work order. They can also add new equipment that was not already in the system.
- When you click click the Select All button, the software will select all equipment each time you open any work order. Clicking Unselect All reverses that behavior.
Payment Info Tab
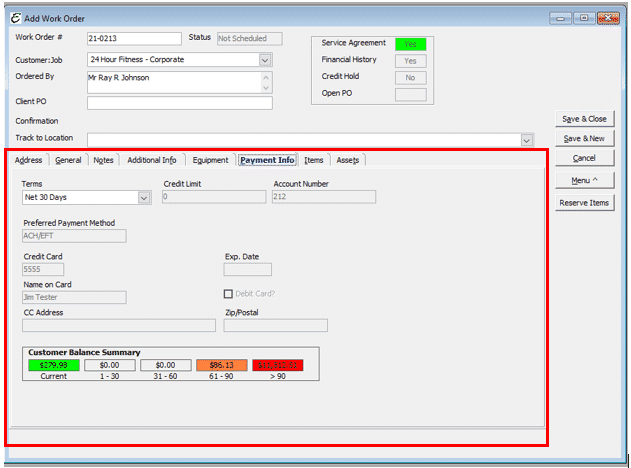
- Terms – Use this area to select the terms for this work order. Note: This defaults to the terms entered for the customer. This is the only editable field on this tab. The scheduler may need to change the terms of the transaction. All other information is read-only.
Items Tab
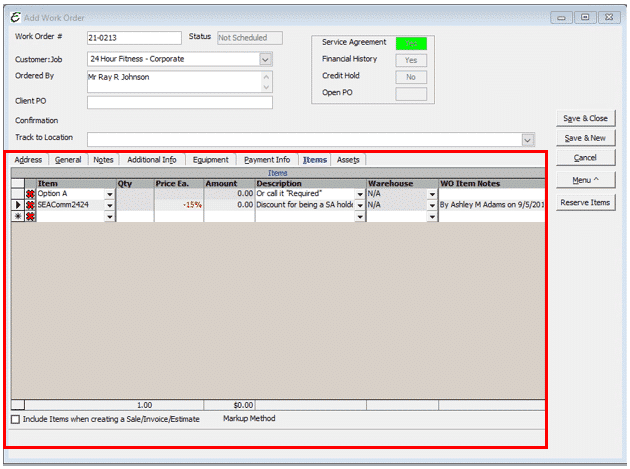
- You can select items from your company’s full Invoice Items list. We include this feature in case you know what the technician may need or what the technician will definitely need. This might include your minimum fee, diagnostic fee, special order part, air filter, and so forth.
Assets Tab
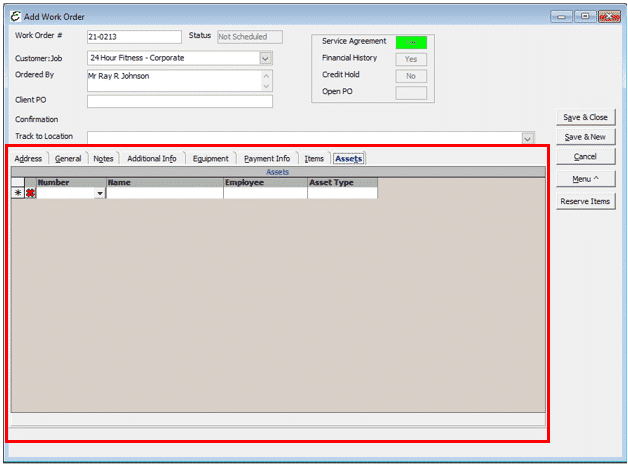
- Select tools and or equipment that might be required for this work order. This might be a pipe threading machine or a special ladder. You are selecting items from your company’s Asset Manager list.
Bottom of the Form

Created/Revised Stamp – After the form has been saved at least once, a Created/Revised stamp will appear at the bottom of the form. This displays the original creator of the work order and the most recent reviser of the work order.
Work Order Menu Button Definitions
An extensive collection of commands are also available from the Menu button. Please note that not all commands are active until the form has been saved at least once.
Save – Manually saves the form.
Save & Close – Saves entered information and closes the form.
Save & New – Saves entered information and opens a new blank form.
Cancel – Exits the form without saving.
Revert – This action is the same as if you clicked “Cancel”, chose NOT to save, then re-opened the existing work order.
Complete Work Order – Sets the work order status to “Complete”.
Complete Work Order/Add Timesheet Entry – Sets the work order status to “Complete”, and automatically opens the assigned employee’s timesheet. Many of the fields in the employee timesheet will be automatically populated with information from the work order.
Add Timesheet Entry – Opens the assigned employee’s timesheet. Many of the fields in the employee timesheet will be automatically populated with information from the work order.
Cancel Work Order – Sets the work order status to “Canceled” and removes the work order from the schedule board. Canceling a work order is generally recommended over deleting a work order. Problem customers sometimes call many service companies only to award the service call to the one who arrives on location first. Then they cancel all the other work orders placed with other companies. If this happens habitually it can cost you money. It wastes your scheduling and dispatching resources while losing the opportunity to do profitable work for reliable customers. By canceling a work order instead of deleting a work order, a history of this behavior can be established. It may be the case you decide to “fire” a customer because of repeated work order cancelations. Don’t be afraid to send problematic and unprofitable customers to your competitors where they can do you some good.
Delete – Deletes the work order (not recommended — consider canceling the work order instead).
Create | Invoice – Creates a new invoice for the customer who appears on the work order. The invoice will automatically be filled in with the customer name and any pertinent customer information which can be brought forth from their customer record (like terms, for example). The invoice will have automatically have the source work order assigned to it, thus keeping the history of the workflow intact.
Create | Sale – Functions exactly like Create | Invoice (above), except the payment is being received immediately, rather than invoicing the customer for payment expected at a later date.
Create | Estimate – Functions exactly like Create | Invoice (above), except it creates a new estimate for the customer on the work order.
Create | PO – Creates a new purchase order where the shipping destination is set to the location of the customer appearing on the source work order, rather than your company’s default shipping destination.
Create | Equipment – Opens the Add Customer Equipment form, an important feature used to record customers’ equipment. See the related topic, “Customer Equipment” for more info.
Select Invoices/Sales/Estimates – Under many circumstances, an association between a work order and a sales form (ie: invoice, sale, etc) is automatically created because either the sale was generated from the work order, or the work order was generated from the sales form. The “Select Invoices/Sales/Estimates” command is used if it is necessary to manually create this association from a work order. A similar command, “Menu > Assign Work Orders” is found in sales forms and is used to create the same association if it more convenient to do so from there.
Printing | Print – Used to print a hard copy of the work order.
Printing | Print Preview – Used to preview a pending hard copy of the work order.
Printing | Print Setup – Used to setup work order printing preferences.
Page – Click this option to bring up your email client (your email software such as Outlook®). The email will be auto-populated with the assigned employee’s pager address (if provided). The email will auto-populate with the Customer:Job and work order information. This feature is used for pagers that allow you to “page” a person’s pager or phone using an email address such as 913-555-1212@pager.pagenet.net. Note: A phone line is not actually used. An internet connection is required.
Email – Click this option to bring up your email client. The email will be auto-populated with the assigned employee’s email address (if provided). The email will auto-populate with the Customer:Job and work order information.
Find Work Order – This command will open the Schedule Board and automatically display the scheduled work order in red highlight.
Reserve Items – Offers the ability to reserve Inventory Items and Serialized items for that customer.
Duplicate – For more information regarding the creating of duplicate work orders, click here.
Select Equipment – Opens a Customer Equipment list, used to associate a work order with one or more pieces of customer equipment. Tick the checkbox for each piece of equipment on which work will be performed. This equipment will appear on the printed work order.
Customer | Customer History – Opens the customer’s history form which displays every sale, check, purchase order, bill, item receipt, service agreement and more, ever involving that specific customer.
Customer | Edit Customer – Opens the customer record for review or edit.
Customer | Contact Log – Opens the customer’s Contact Log, used to enter detailed notes about the account. See the related topic, “Contact Log” for more information.
Work Order History – Opens the history for the work order. This includes all sales, timesheets, PO’s, A/P, and Journal Entries associated with the work order. See the related topic, “Work Order History” for more information.
Related Work Order Content

